
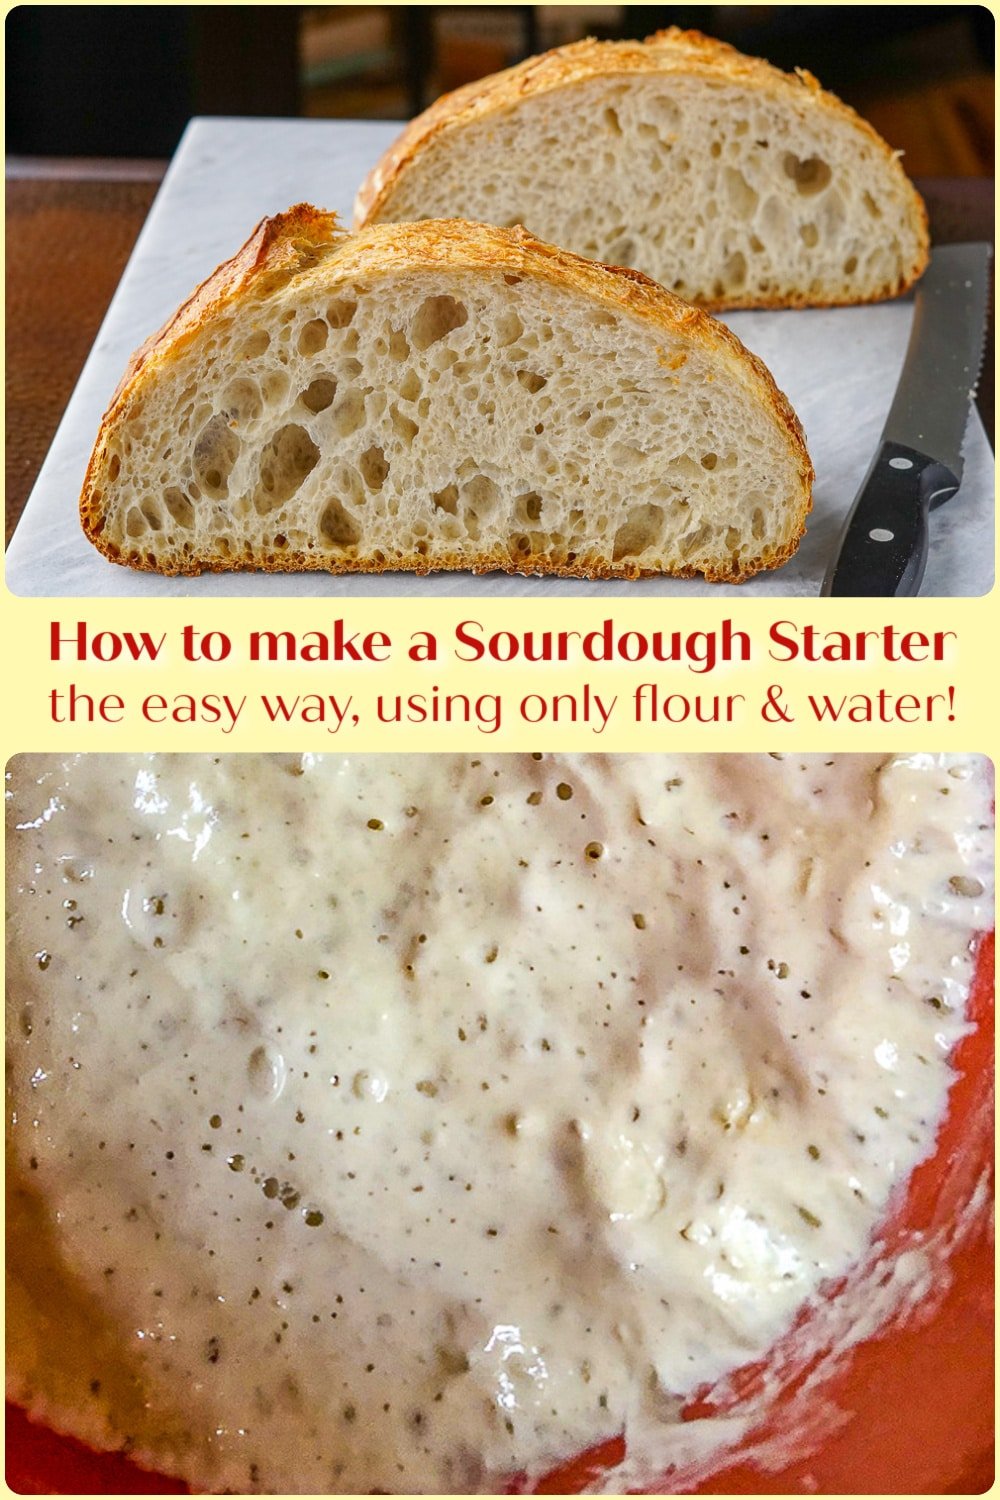
How to make Artisan Sourdough Bread. Detailed instructions from a pro baker.
How to make Artisan Sourdough Bread. Detailed instructions from a professional artisan baker. Jaime O'Flaherty will take us from starter to your first loaf with plenty of photos and helpful tips to ensure beautiful bread success.

Dedicated to the memory of Jamie O'Flaherty, who sadly passed away in September of 2023.
Today, I am absolutely delighted to once again feature artisan baker Jamie O'Flaherty on Rock Recipes as he gives us detailed instructions of how to make artisan sourdough bread. You'll remember that Jaime showed us How to Make a Sourdough Starter last year.
Now we will put that starter to good use with detailed instructions on how to bake your perfect first loaf. And hopefully many more loaves for years to come.
Now over to Jamie.

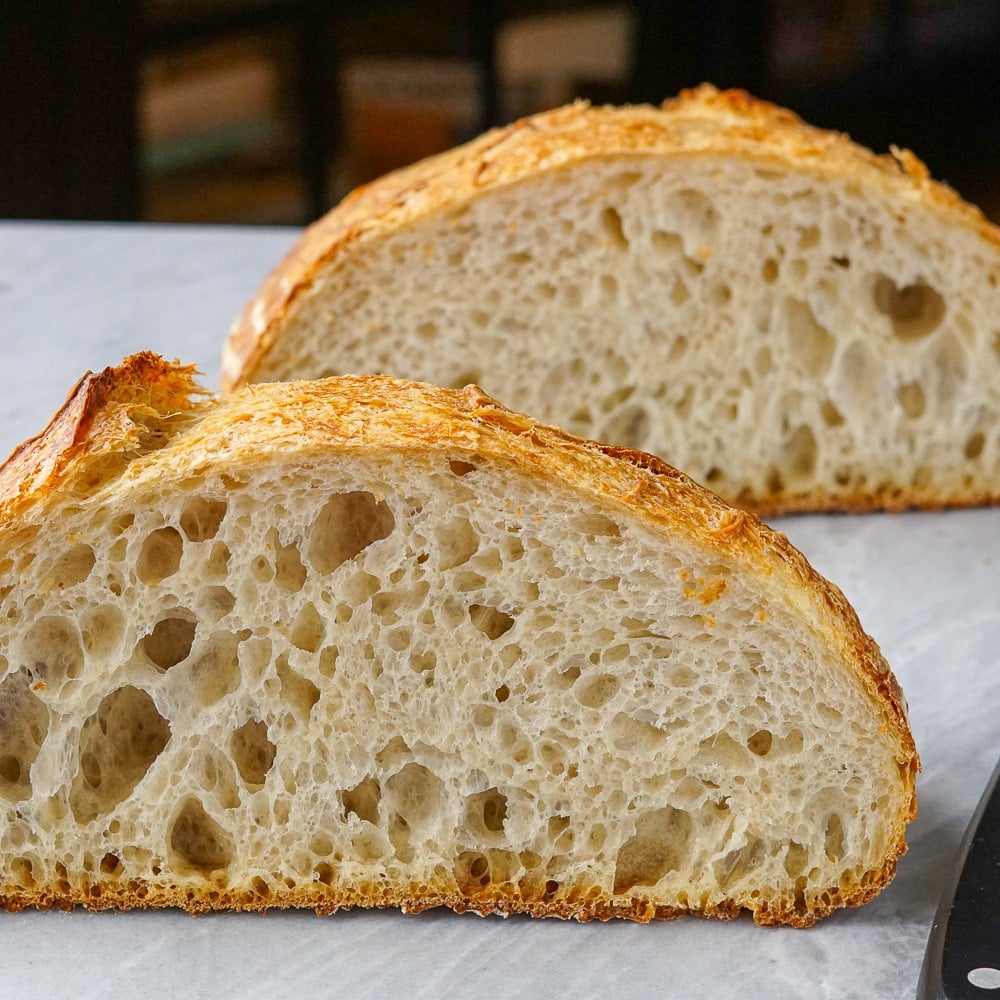
How to make artisan sourdough bread.
Artisan Sourdough Bread. Detailed instructions.
Materials
- (This recipe will make two 750 gram loaves)
- 800 grams of white flour (bread flour or all purpose flour, treated or unbleached, organic or not, all good)
- 500 grams of 28 C water
- 18 grams of table salt (feel free to use Kosher, Pink Himalayan, whatever you normally use)
- 200 grams of starter that isn’t past peak.
Tools
- Stainless steel bowl that will double as a baking vessel for your bread (more on this later when we get to that section)
- Bowl scraper
- instant read thermometer probe
- Wooden or plastic mixing spoon
- A reasonably accurate scale that has a tare function and can weigh in grams
Instructions
Let’s make some dough!
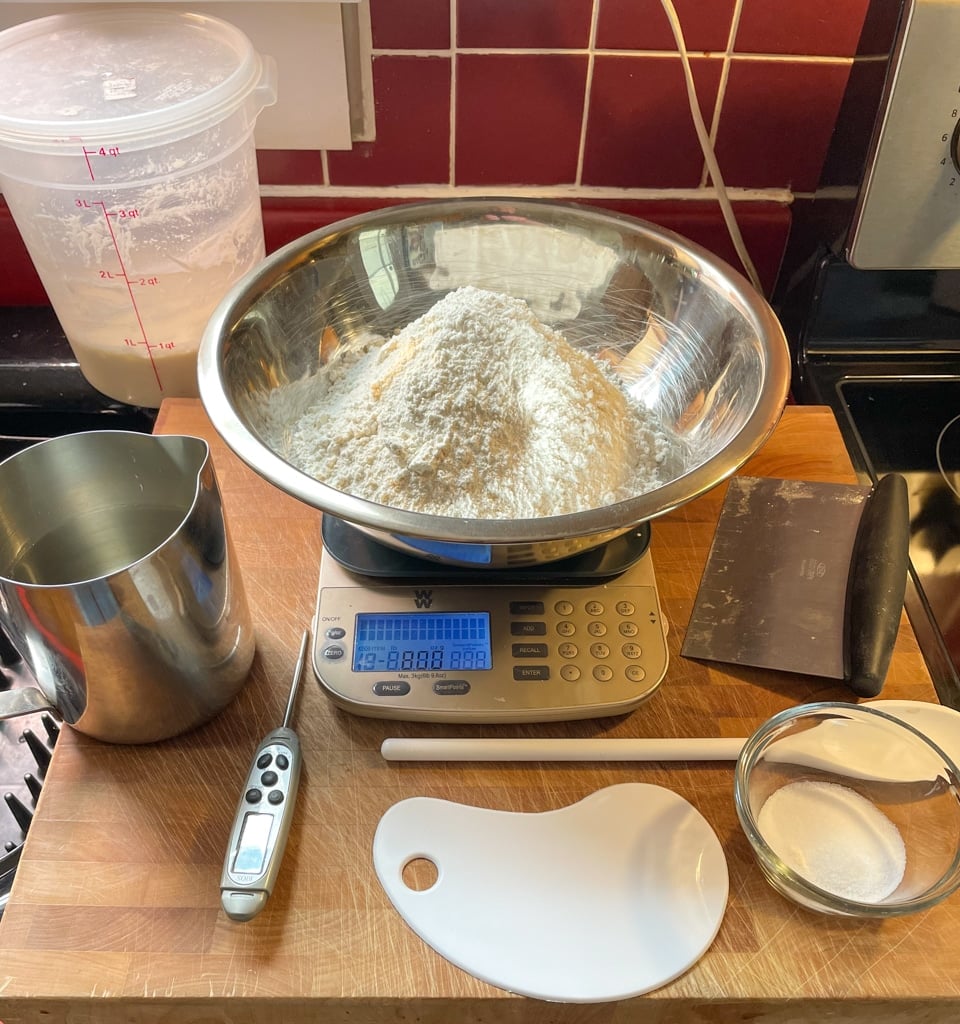
- Gather ingredients, tools and utensils.Chefs that are organized learn and use a term “mise en place”. It basically means everything you need is prepared and ready.

- You can see in the picture everything I need to mix my dough is there and ready. The flour is weighed, the correct temperature water is in a jug and weighed, salt is weighed, the bowl scraper and spoon are close at hand.
- This setup means I don’t have to look for anything while I’m in the middle of mixing my dough. (If you’re used to enjoying your time in the kitchen, you probably already practice this!)
Mix your dough.
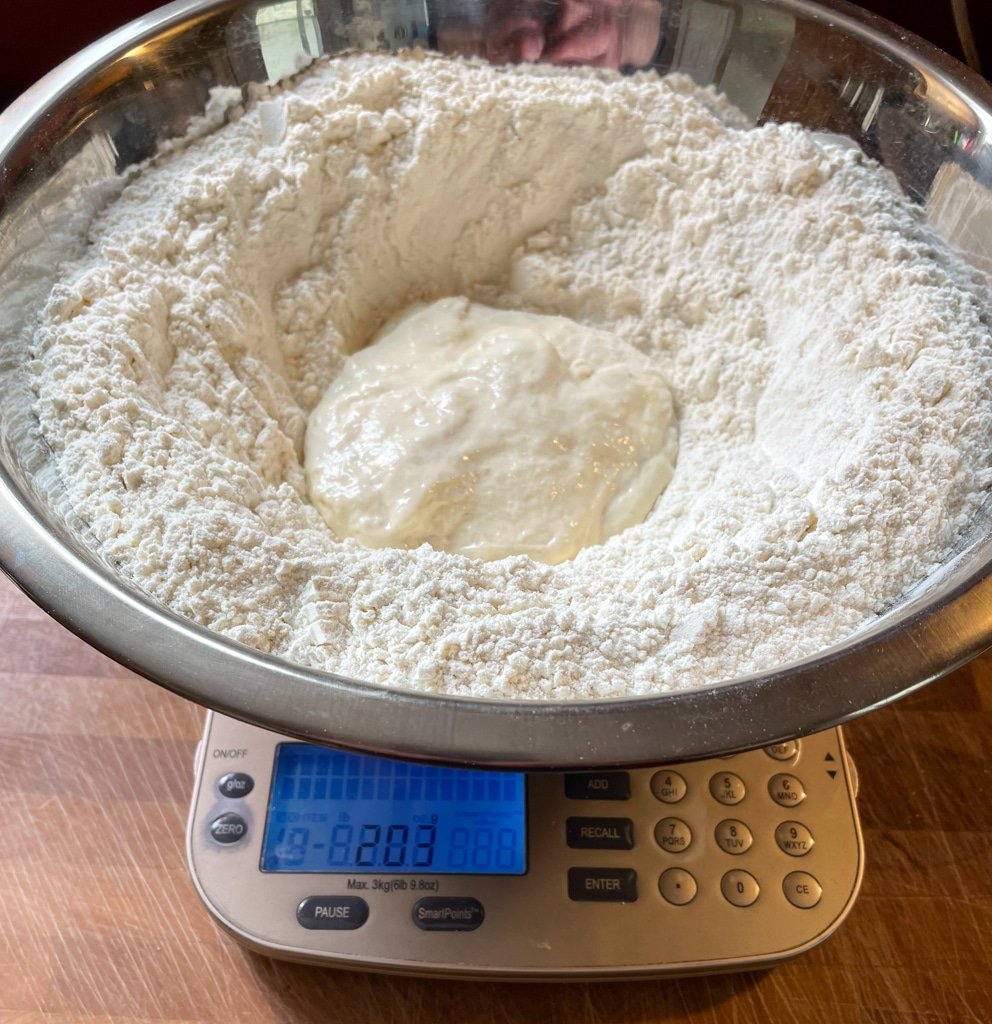
- Pour the salt in your flour and mix or stir to incorporate the salt fairly evenly through the flour. Using the spoon, dig a well in the flour, tare your scale so it reads 0 and weigh 200 grams of starter into the well.

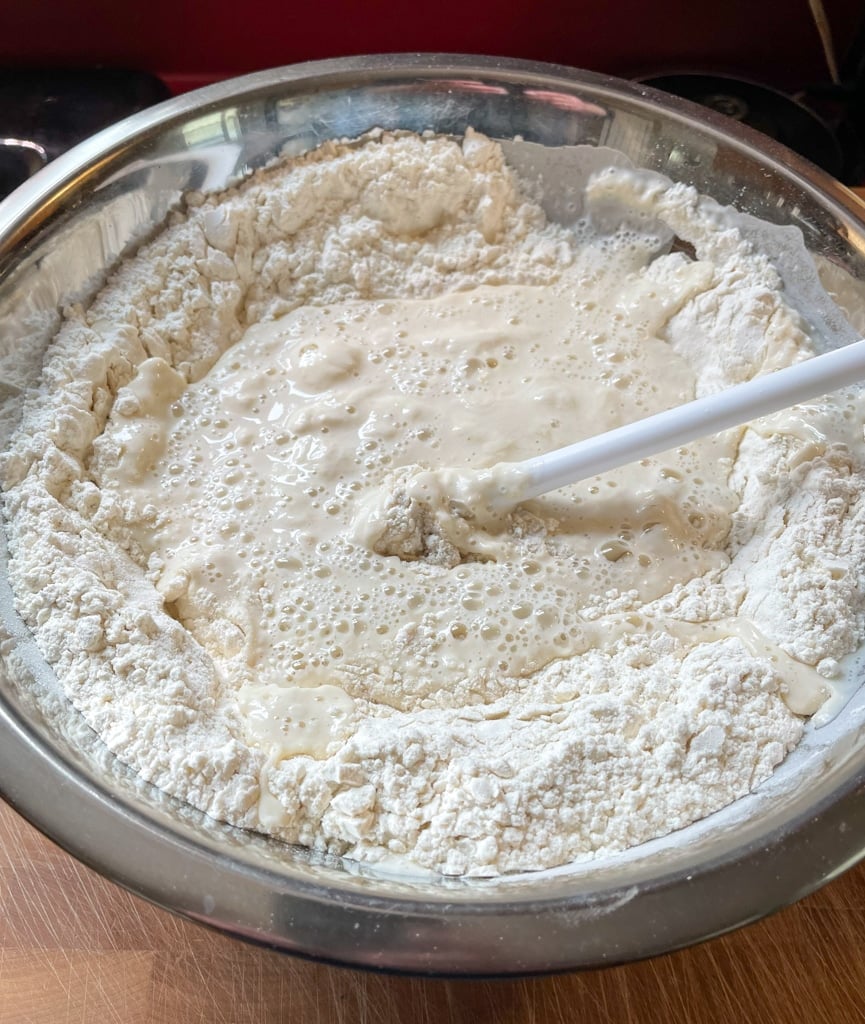
- Tare the scale again and pour in the 500 grams of water. Using the spoon, start stirring slowly to dissolve the starter into the water. (I like to use the handle end to do this. I find it works better and cleanup is easier!)

- Gradually widen the stirring/mixing motion so you’re pulling some flour in from the sides. As you incorporate more flour into the mix, you’ll find the dough start to stiffen a bit. Keep mixing, picking up as much dry flour as possible.

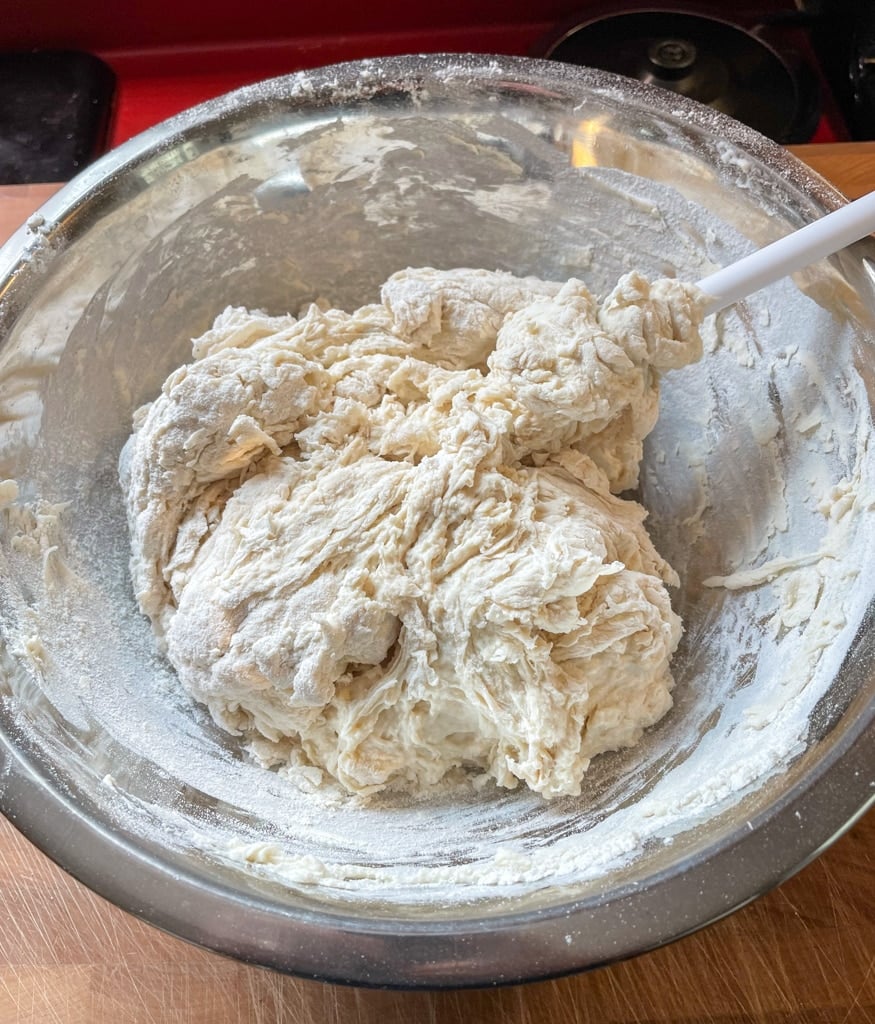
- Once most of the flour is somewhat hydrated, clean off the spoon and using your bowl scraper, scrape down the bowl in sections, using the end of each motion to turn the dough over on itself. Turn the bowl about ⅛th turn after each motion and repeat.
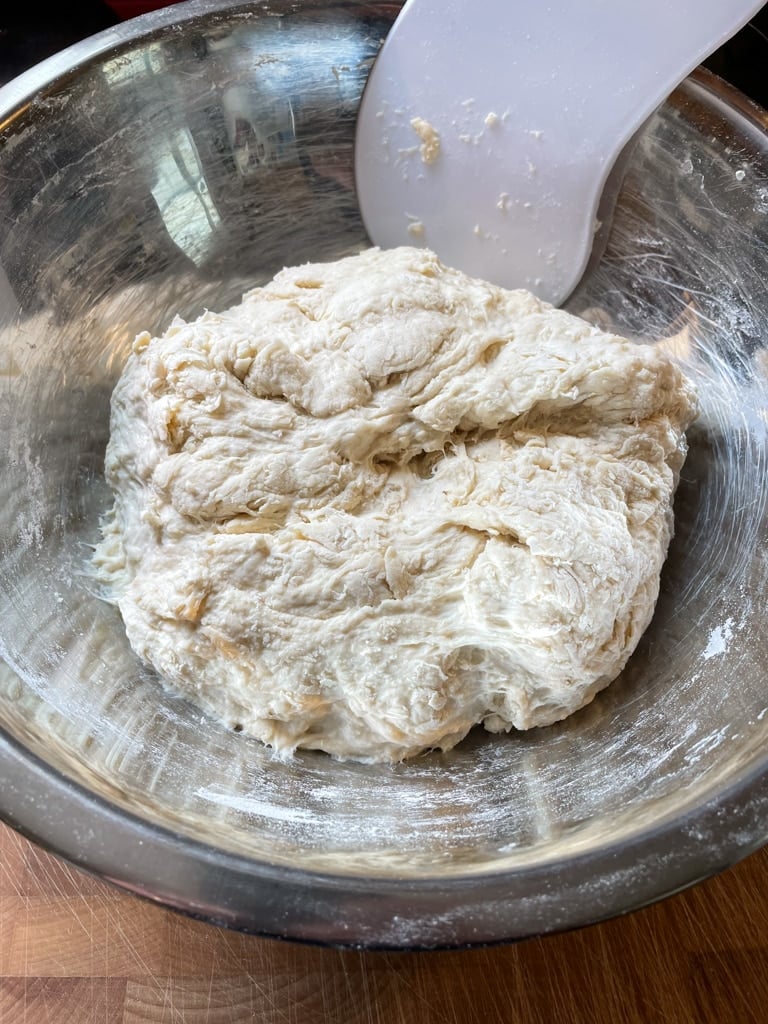
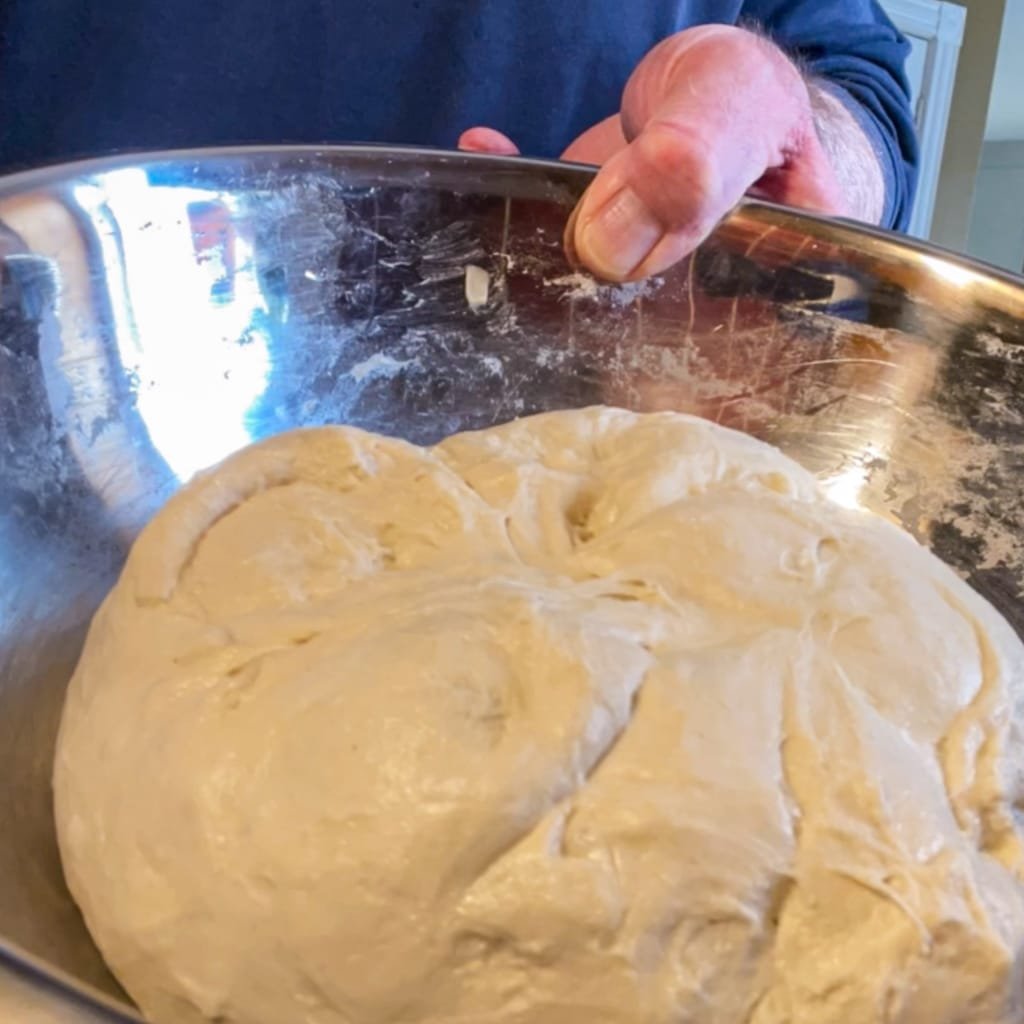
- You’ll end up with what looks like a fairly dry ball of dough. This is good.

- Cover the bowl with a damp dish towel, or plastic wrap, or a plate, whatever fits to keep the dough from drying out. Put it some place warm and wait 25 to 30 minutes. (If your kitchen is cool, as in less than 22 or 23 C, you should find a warmer place for it.
- I find in the microwave, with the door slightly ajar so the light is on, or in the oven (turned off and the button / knob taped with masking tape so nobody turns it on) with the light on are both good choices. Maybe you even have an electric throw that has a low temperature setting, this is a great tool to have.)
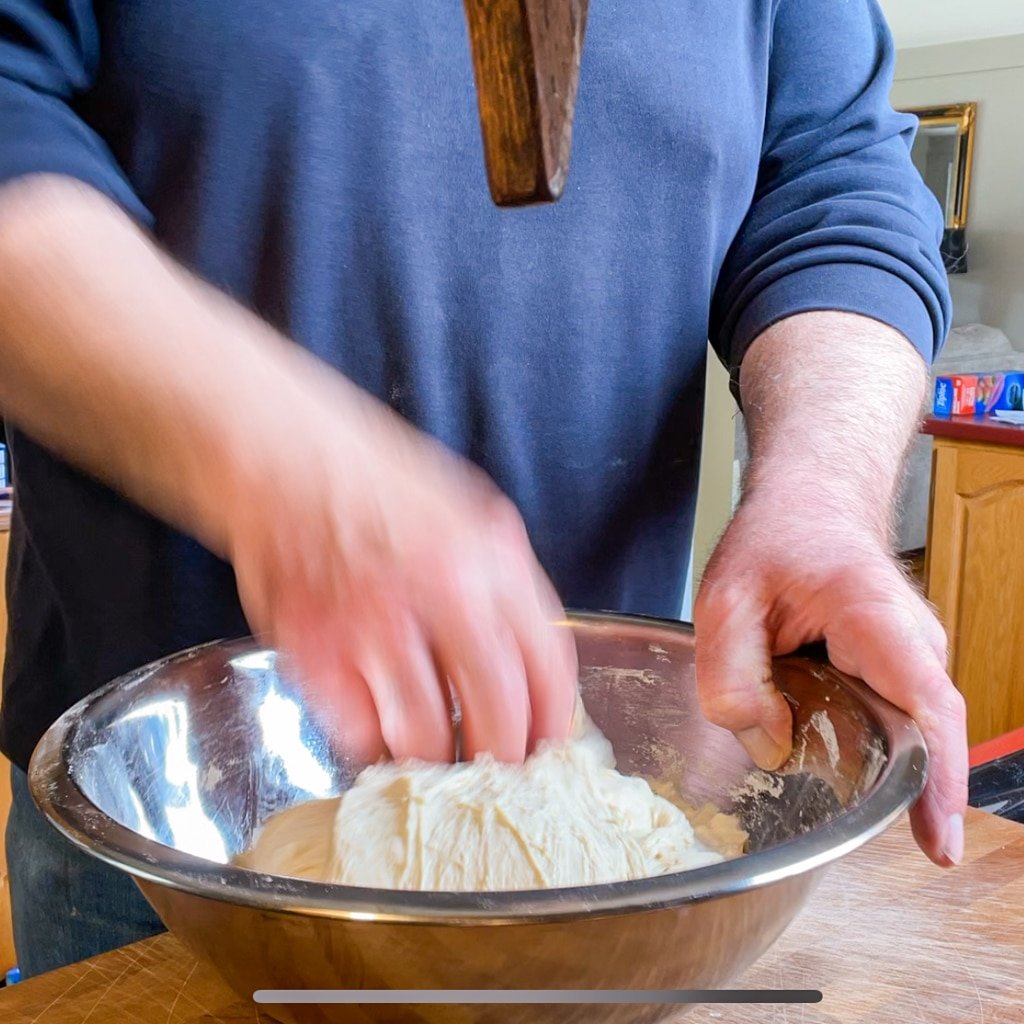
Stretch and Fold (S&F)
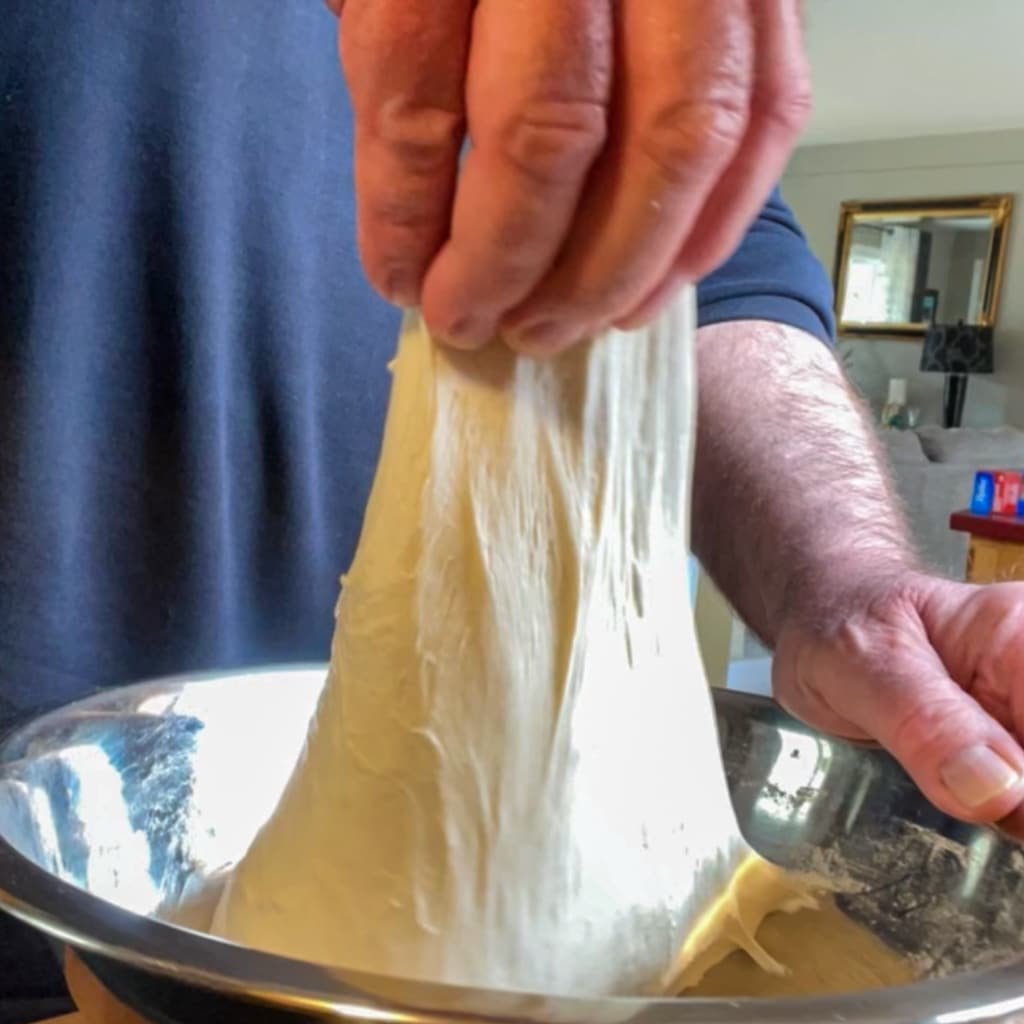
- So now you want to perform this process on the dough to equalize temperature, and most importantly, to develop the gluten web. This process stretches, aligns and strengthens the gluten strands.
- Through this process you’ll feel the dough change in your fingers, and it’s this reason I recommend against using a stand mixer. You WANT to feel this change and to be honest, it feels kind of special knowing it’s your skills that are helping the dough form properly.
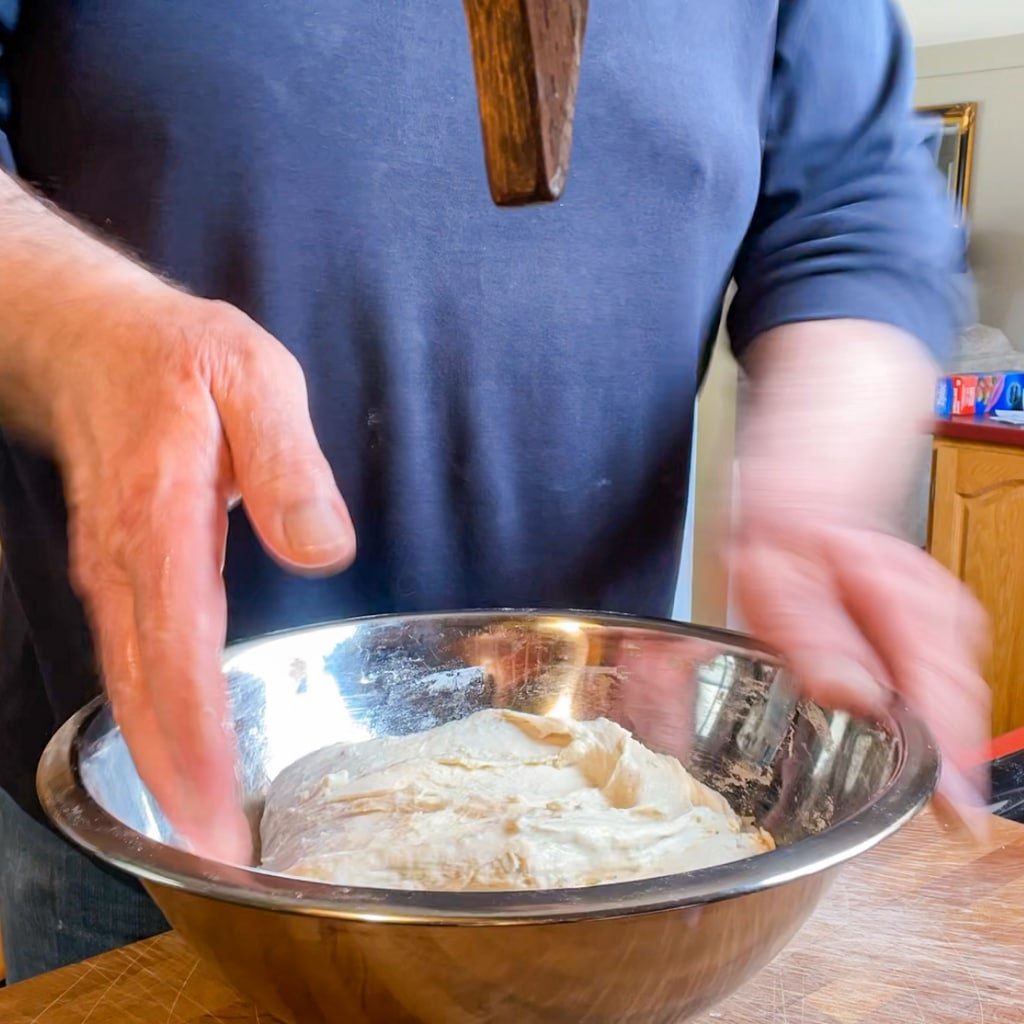
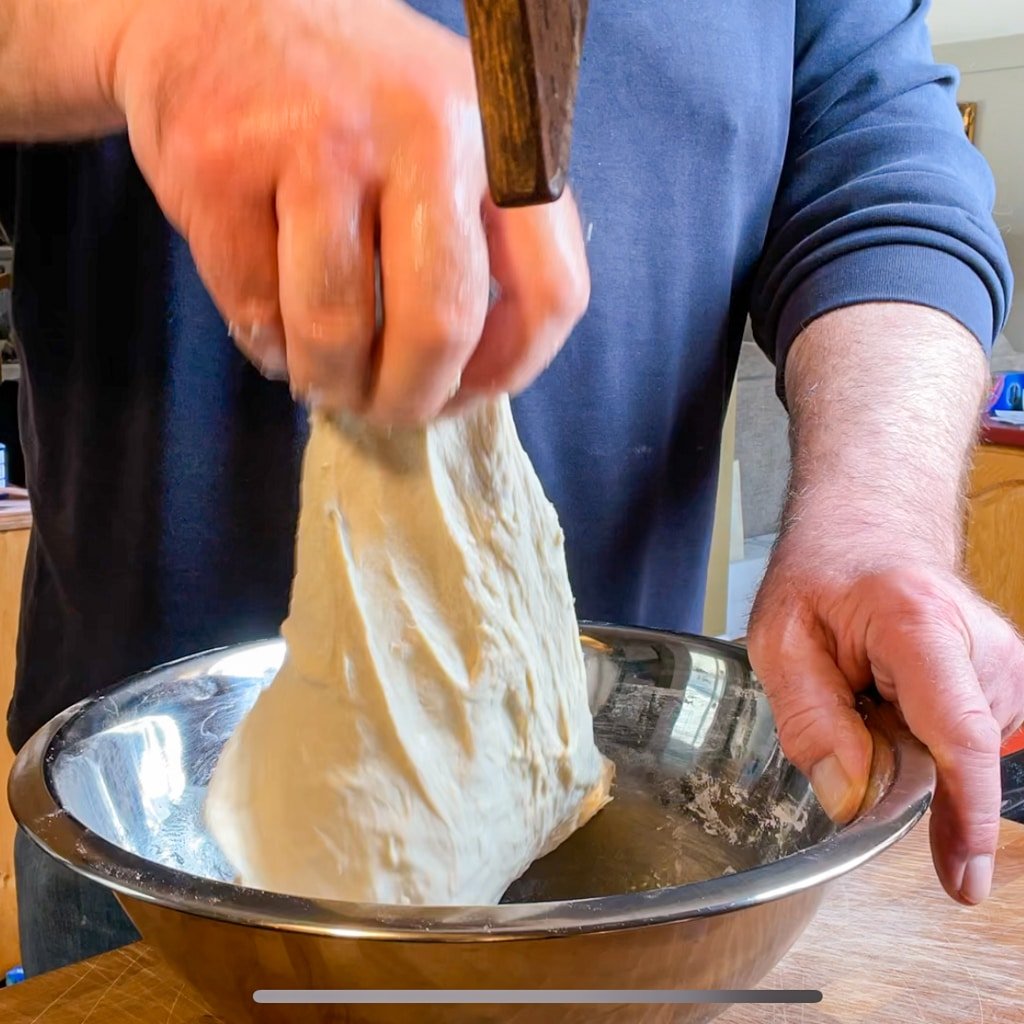
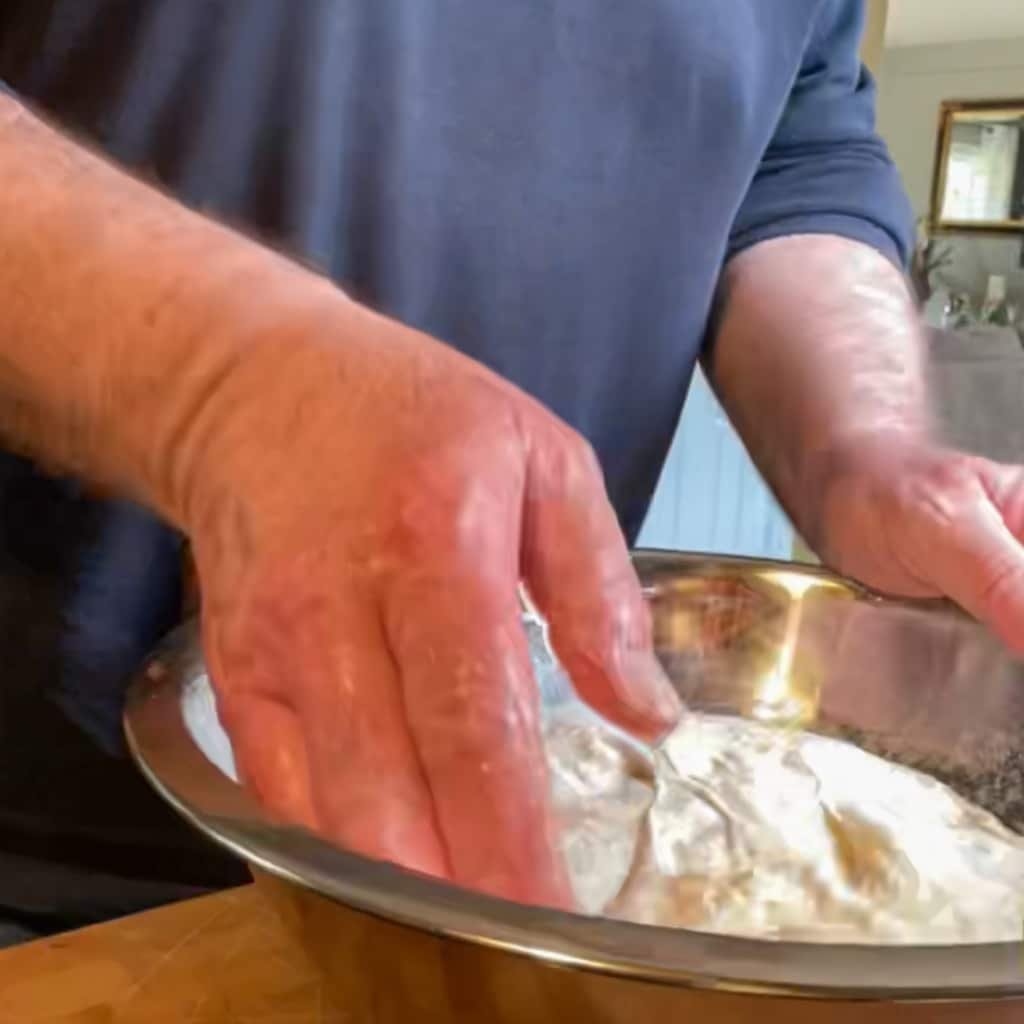
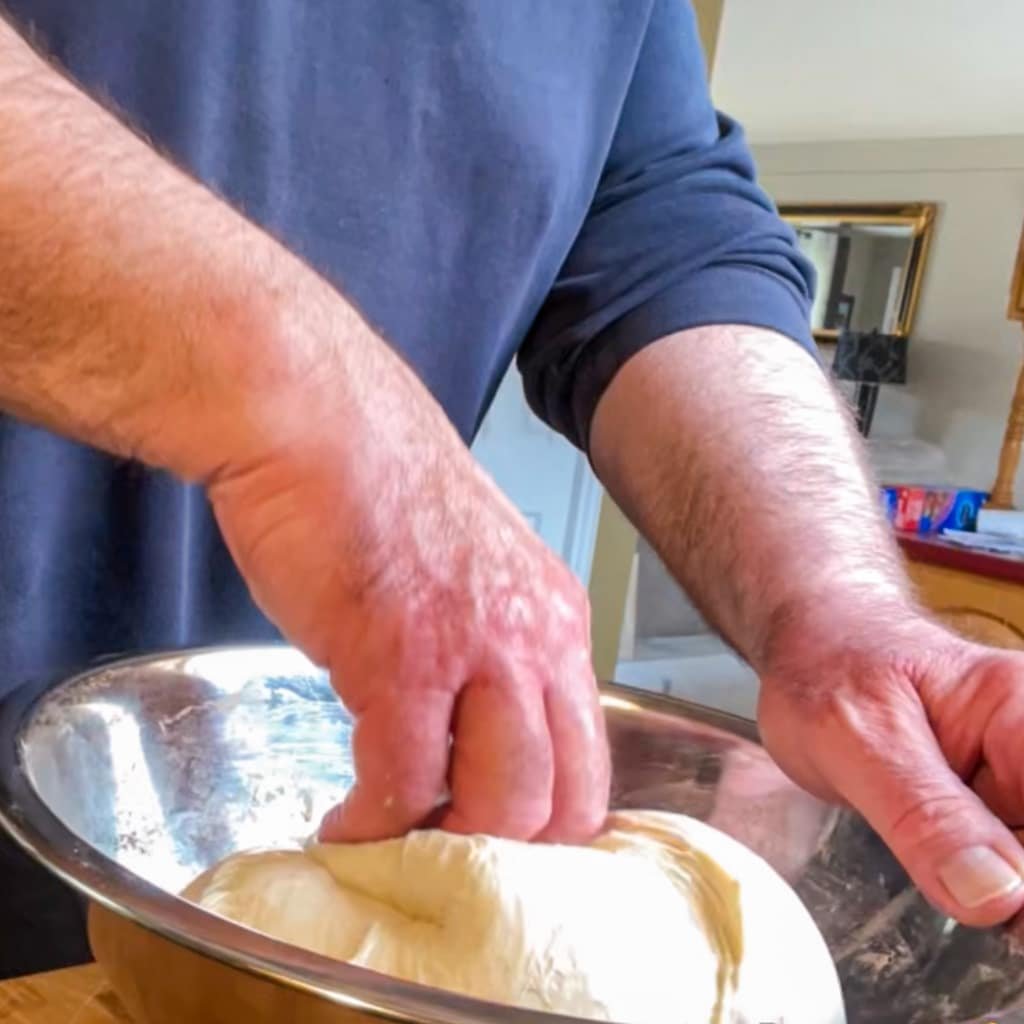
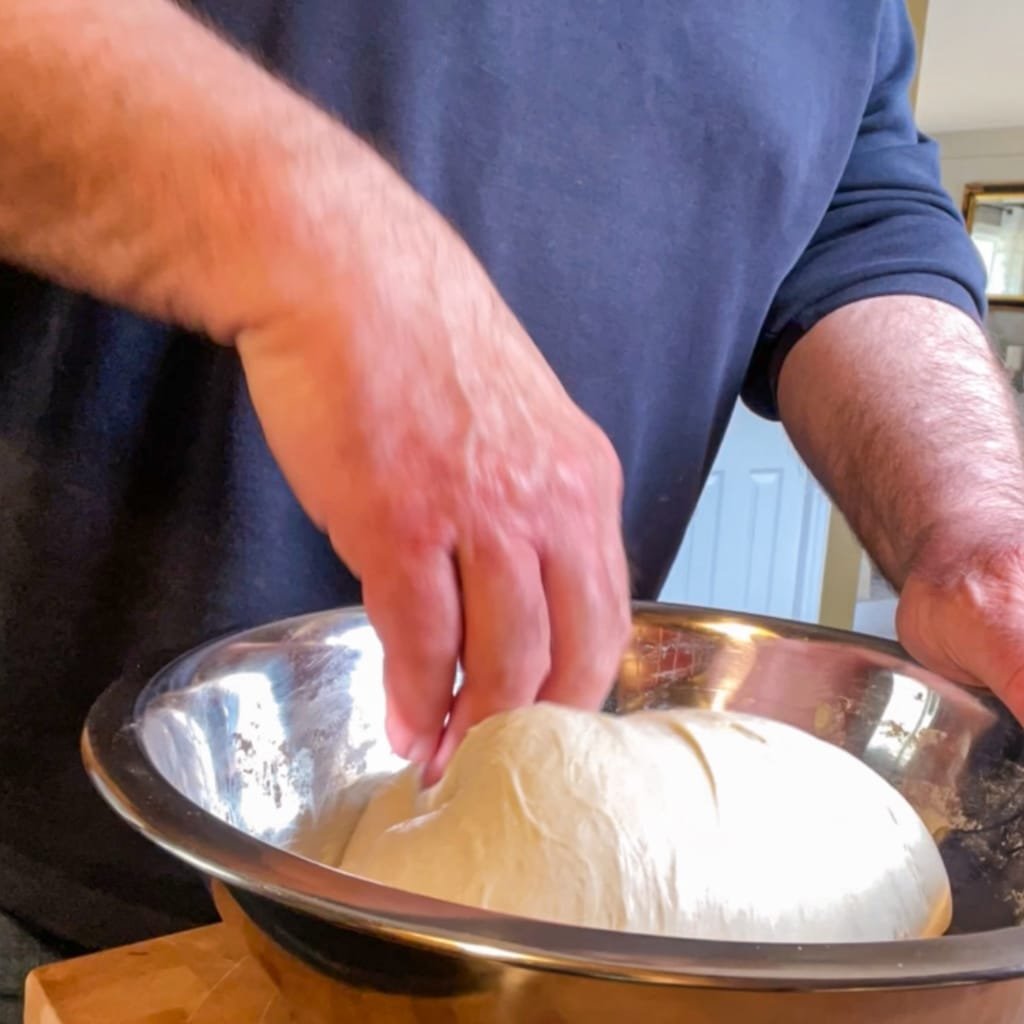
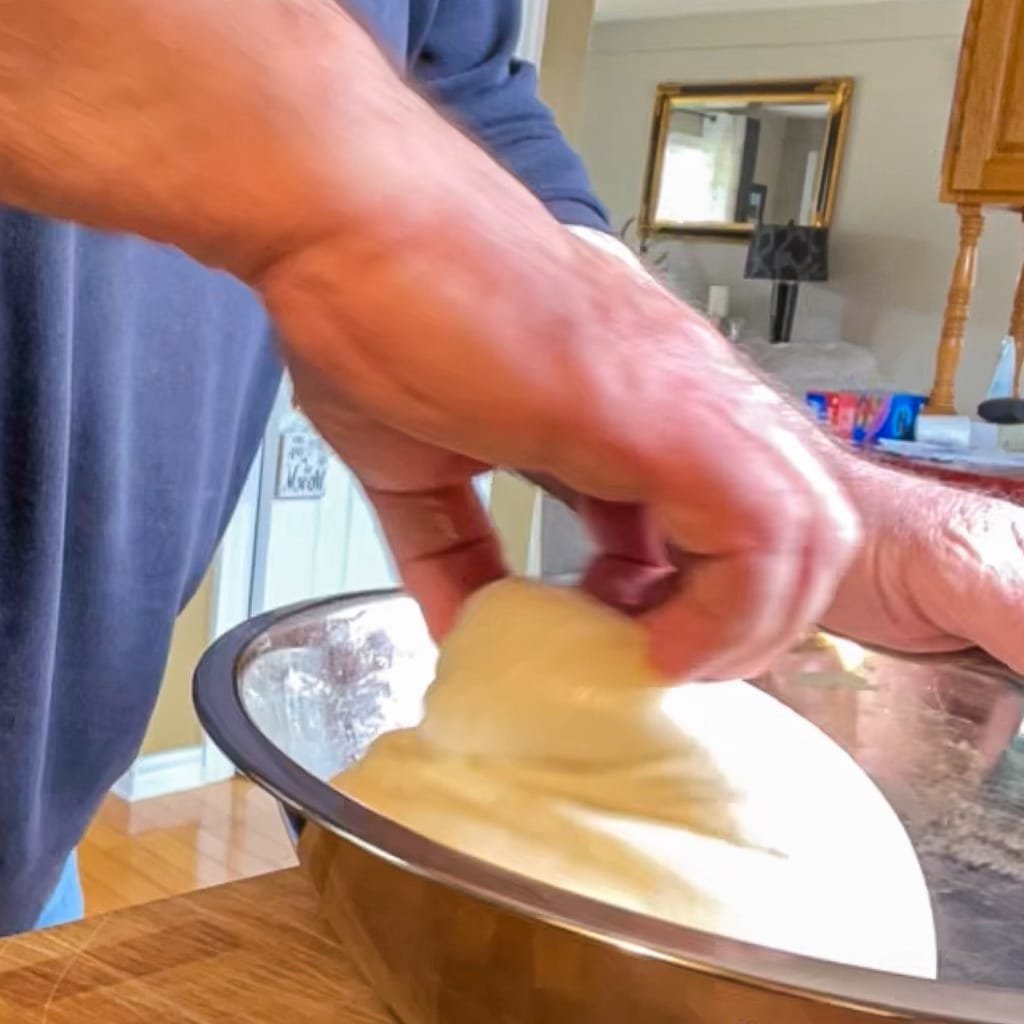
- With a wet (very important) hand, scrape the dough away from the side of the bowl, and lift it up. Fold that dough back on top of the rest of the dough.

- Turn the bowl ¼ turn, and repeat.
- Repeat twice more so now you’ve gone all the way around the bowl. This is called a “set of S&F”. (NOTE: You may tear the dough, which is a sign you’ve pulled it a bit too far. This isn’t a problem now, but it may cause a problem later when the gluten is more developed.)
- Cover the bowl and return it to it’s warm spot.
- After 25 or 30 minutes, repeat the above series of steps. You’ll notice how much the dough has changed in that time. It’ll be smoother, and you may find it is a little more resistant to your stretching motion.
- If your starter is mature and healthy, you will probably notice a bit of “poofyness” to the dough. That’s a good thing.
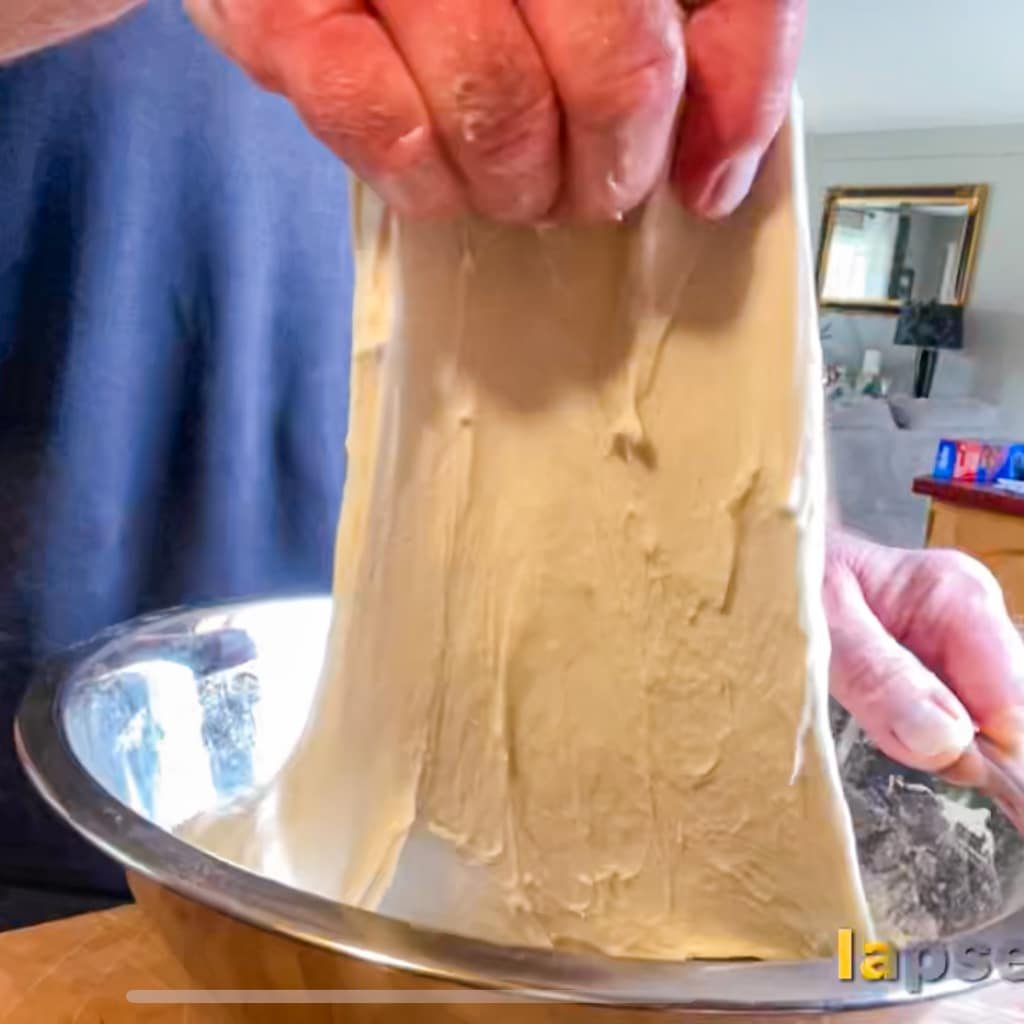
- Another 25 or 30 minutes, you’ll repeat the process again. Now you’ll really see a change.
- More resistant to pulling (now you need to be careful not to tear the dough, but you also need to not be afraid to stretch it close to maximum), more elastic, very smooth, not nearly as sticky, and significantly more “poofy”. All these are good things.
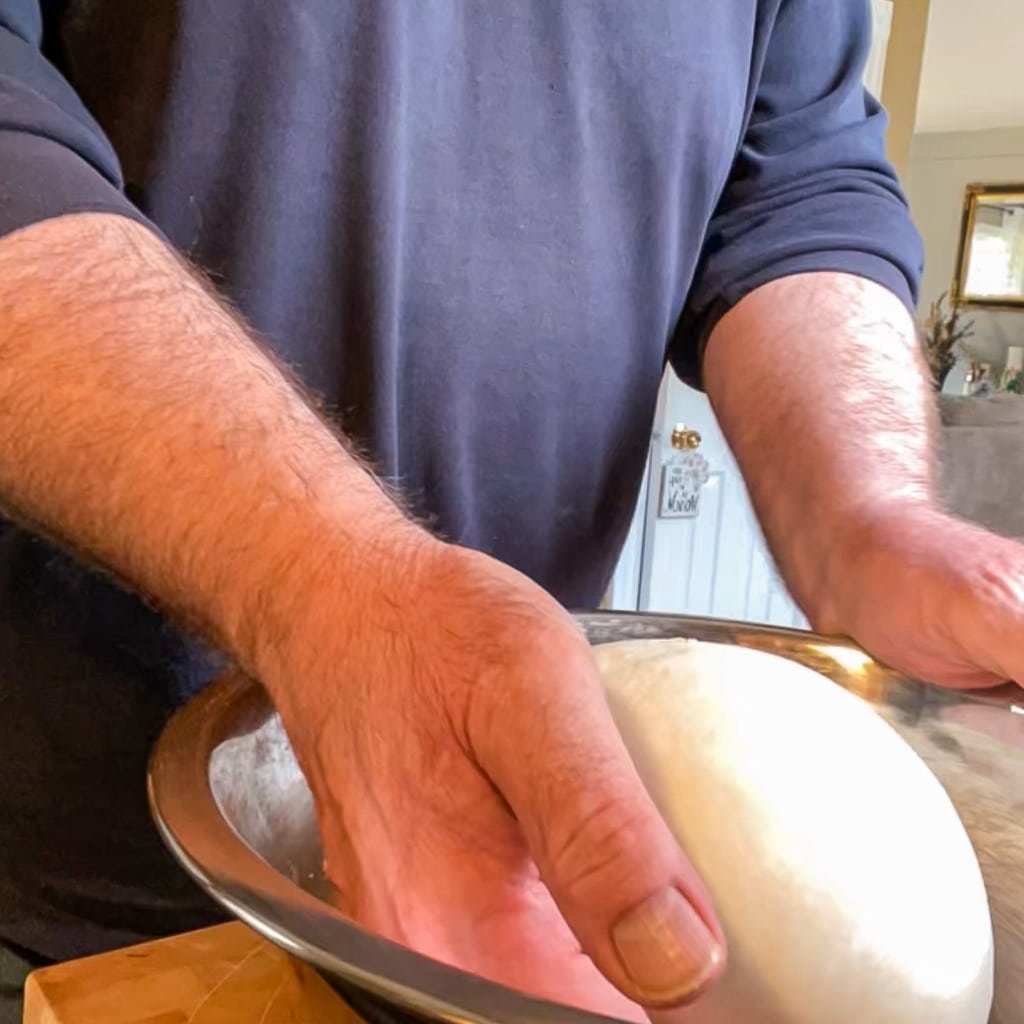
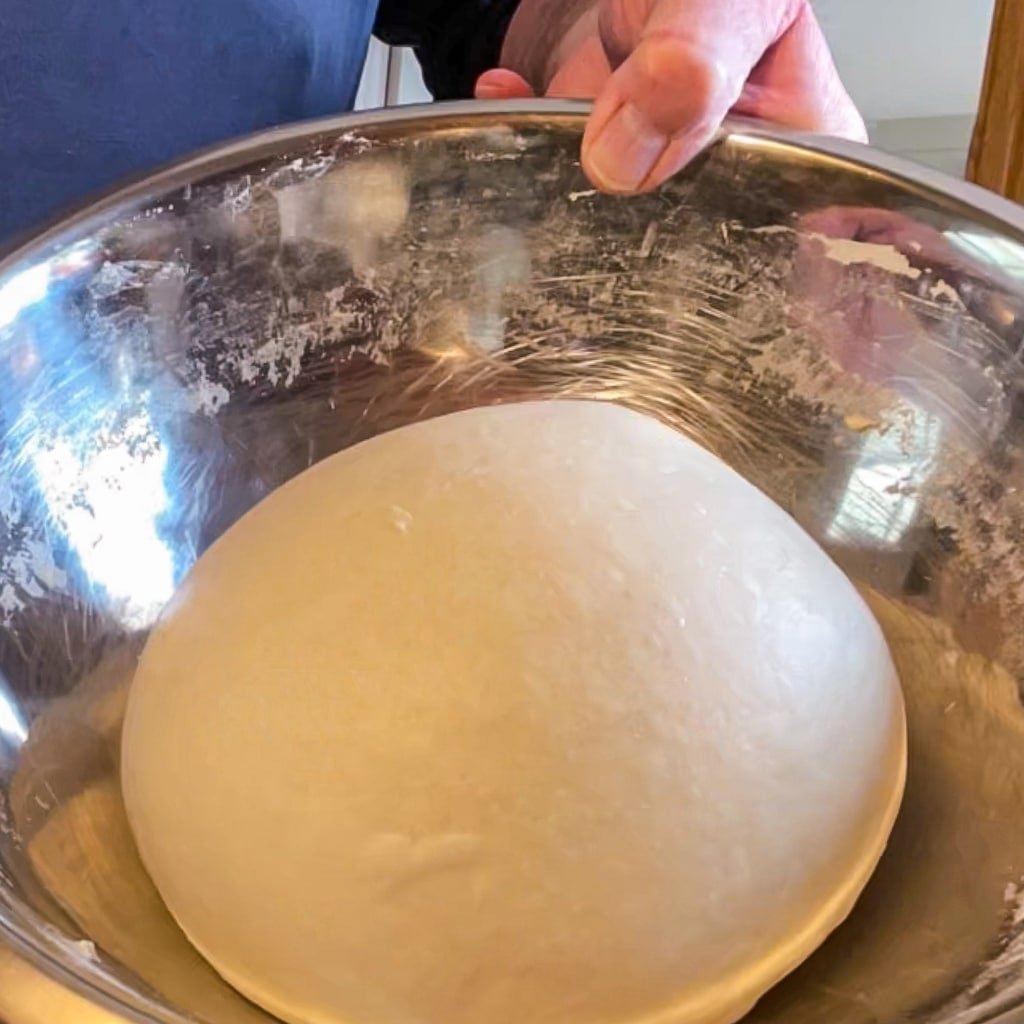
- After the 3rd set of S&F, I like to shape the dough into a fairly tight ball and place it in the bowl seam down.
- Now you’ll return the bowl to it’s warm place and leave it alone for about 2 hours. By that time it should have risen to about a 50% increase in size.
- So now you’re ready to shape your dough.


Divide, preshape and shape the dough.
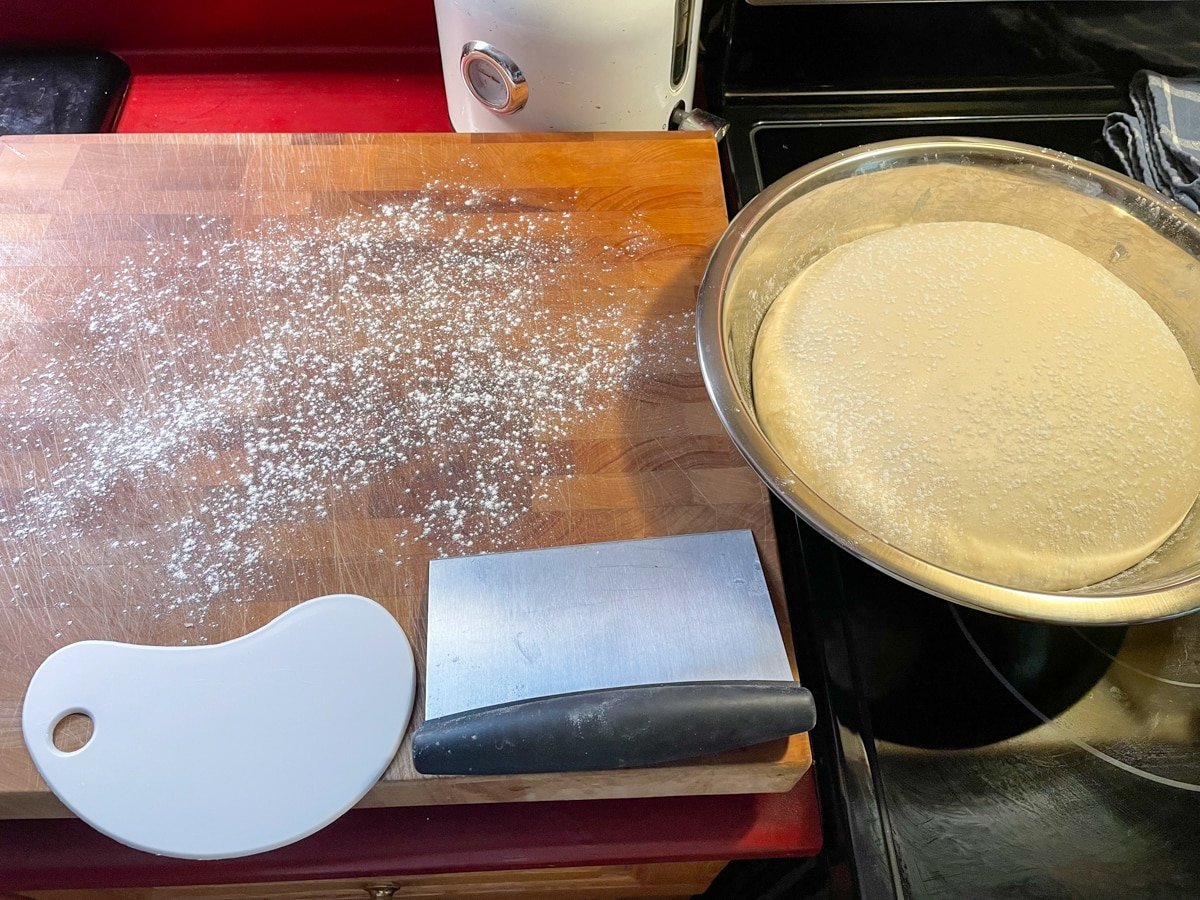
- Lightly flour the top of the dough (let’s call this the good side), especially around the perimeter of the bowl. Lightly flour your work surface.

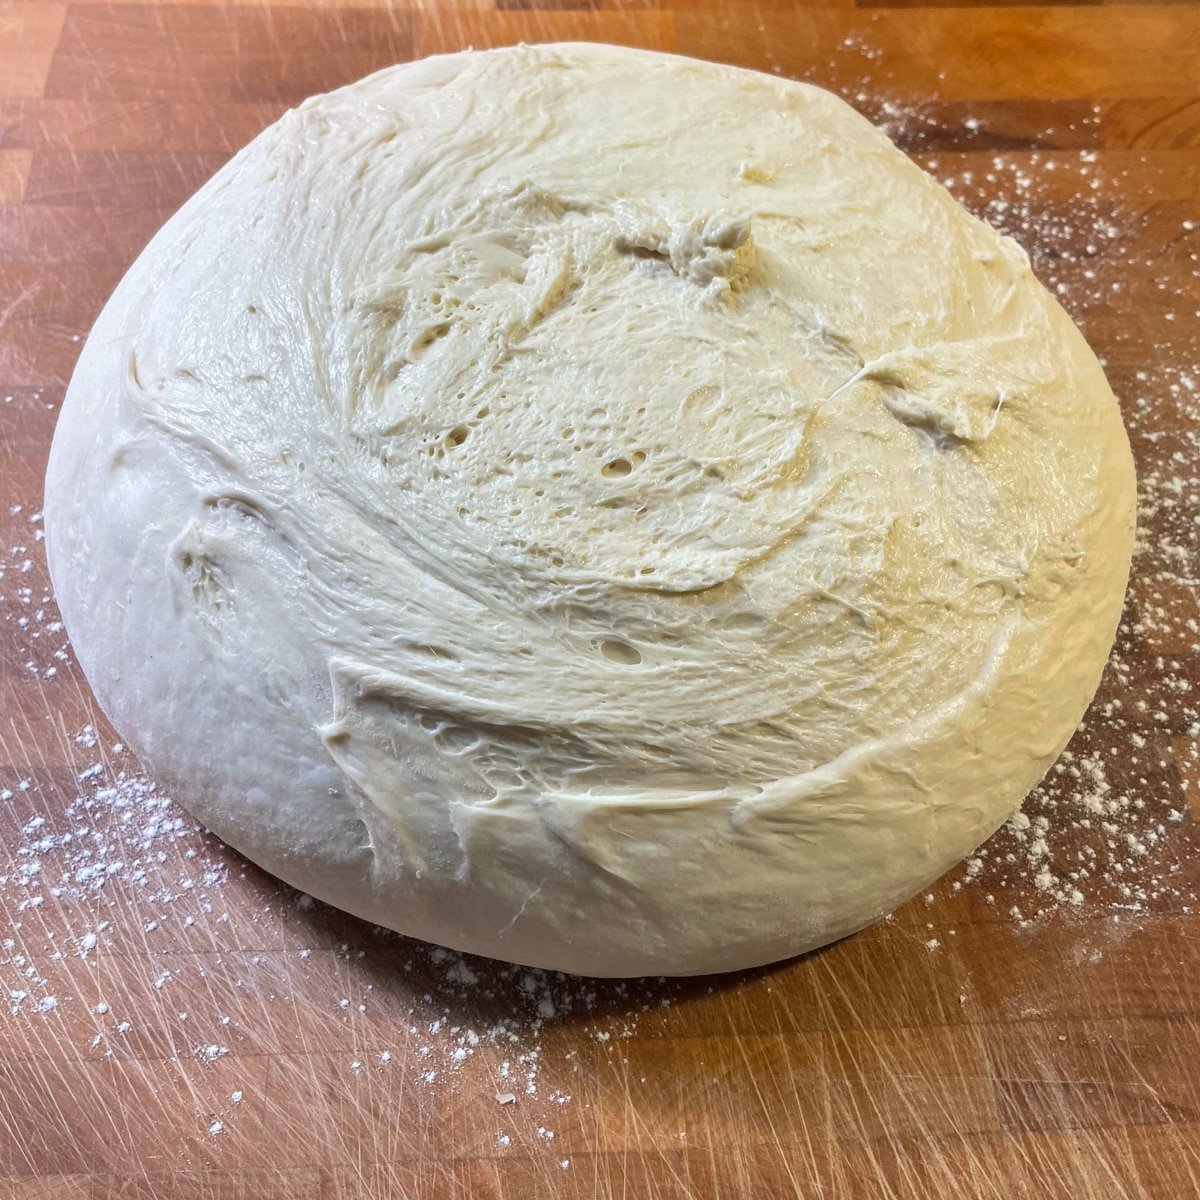
- Using your fingers or a bowl scraper, work around, loosening the dough from the sides of the bowl and tip it out onto the work surface with good side down.

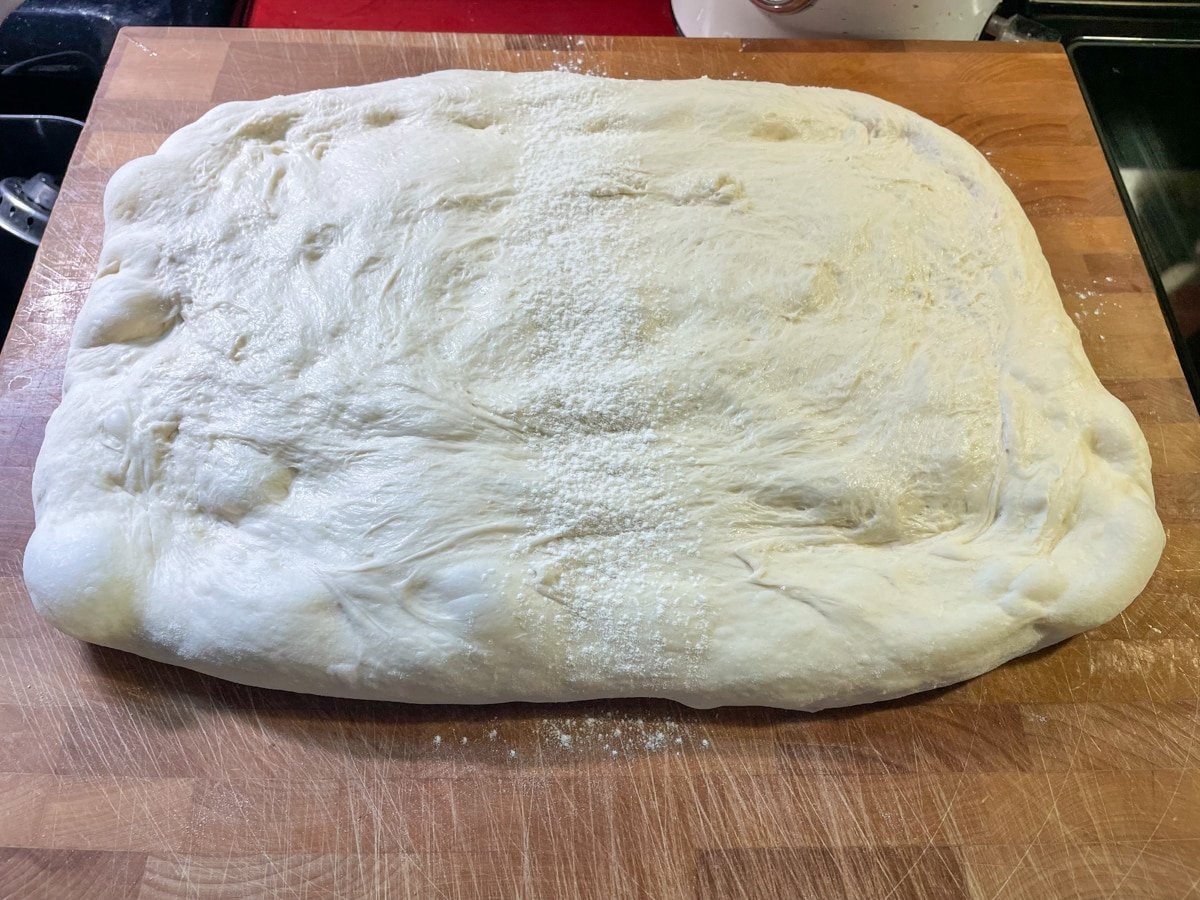
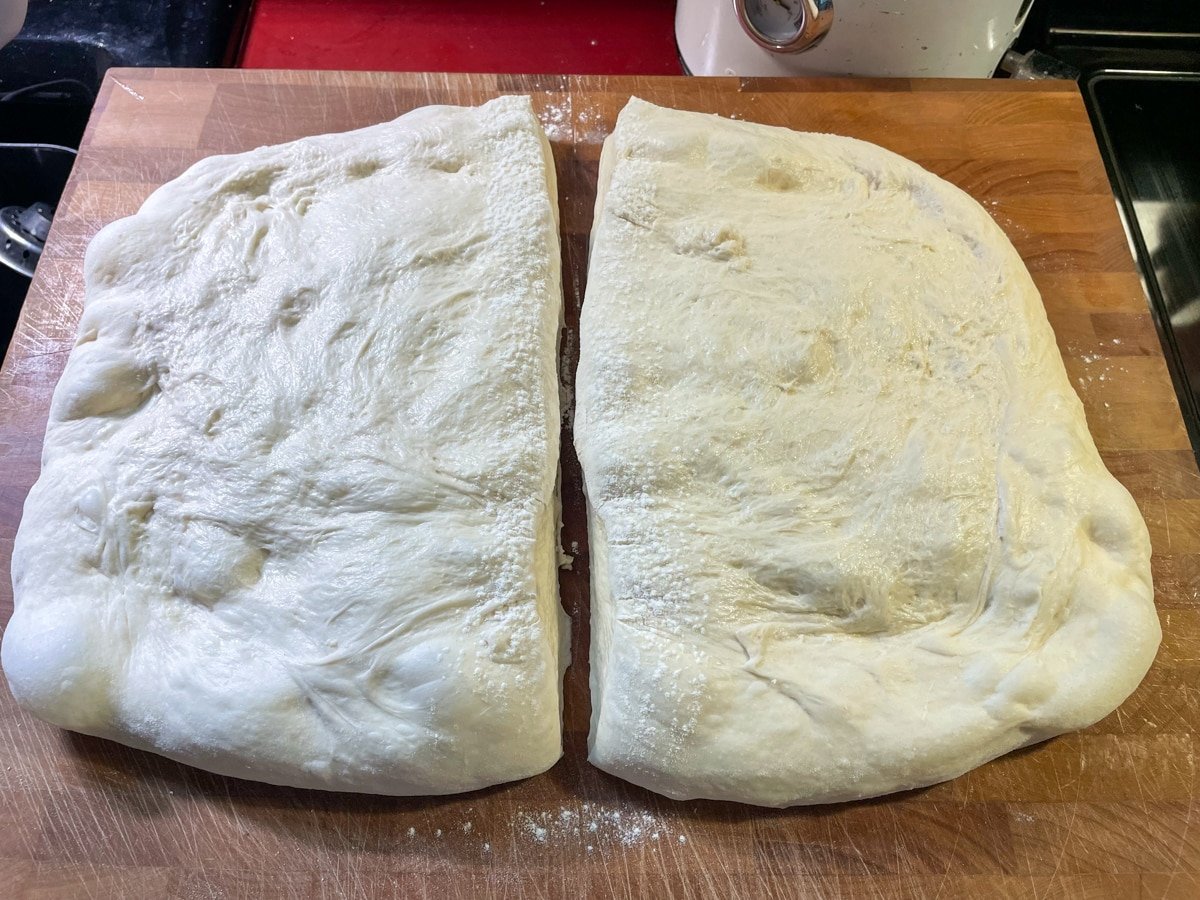
- Flatten the dough and shape to a rough circle or square, breaking any large bubbles that form, but don’t flatten it too much.
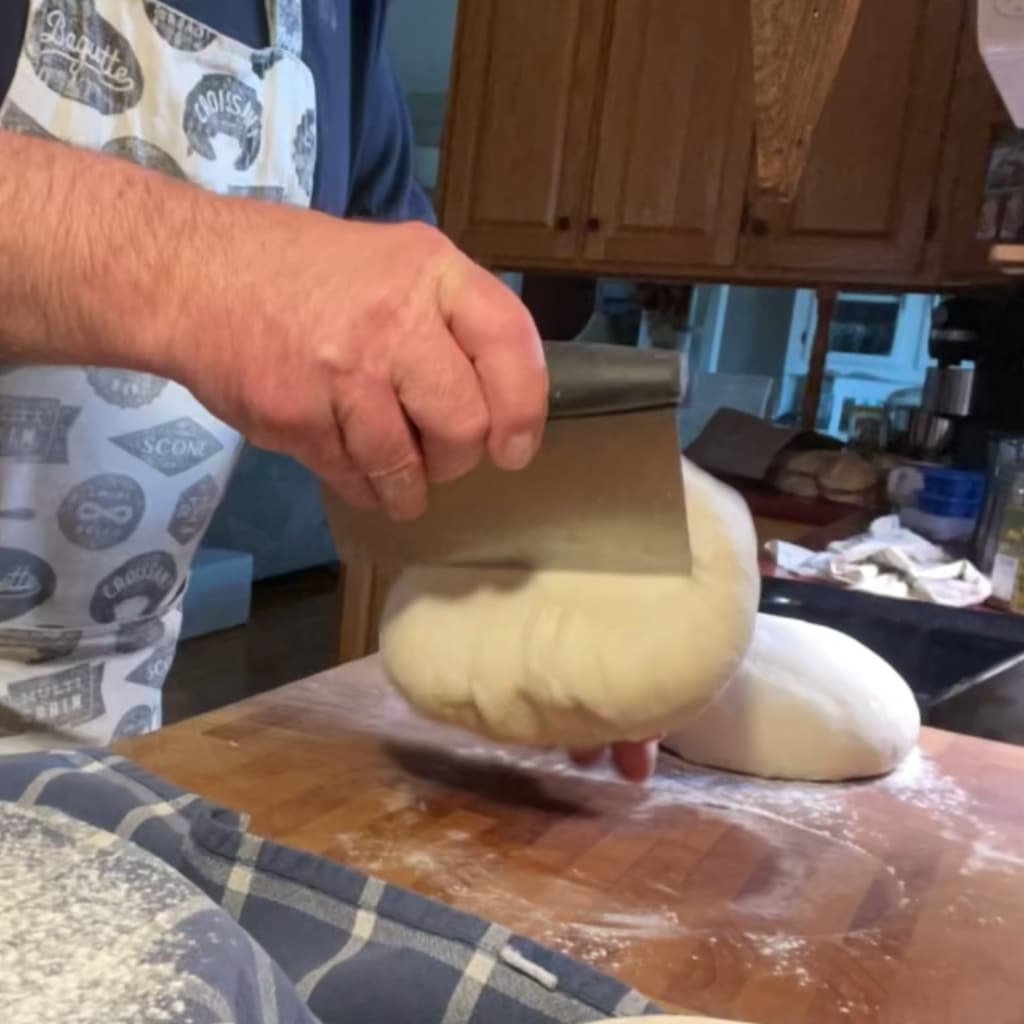
- Sprinkle a bit of flour along the line you plan to cut, and divide the dough using the bench knife or a straight edge of the bowl scraper, separating the pieces slightly.
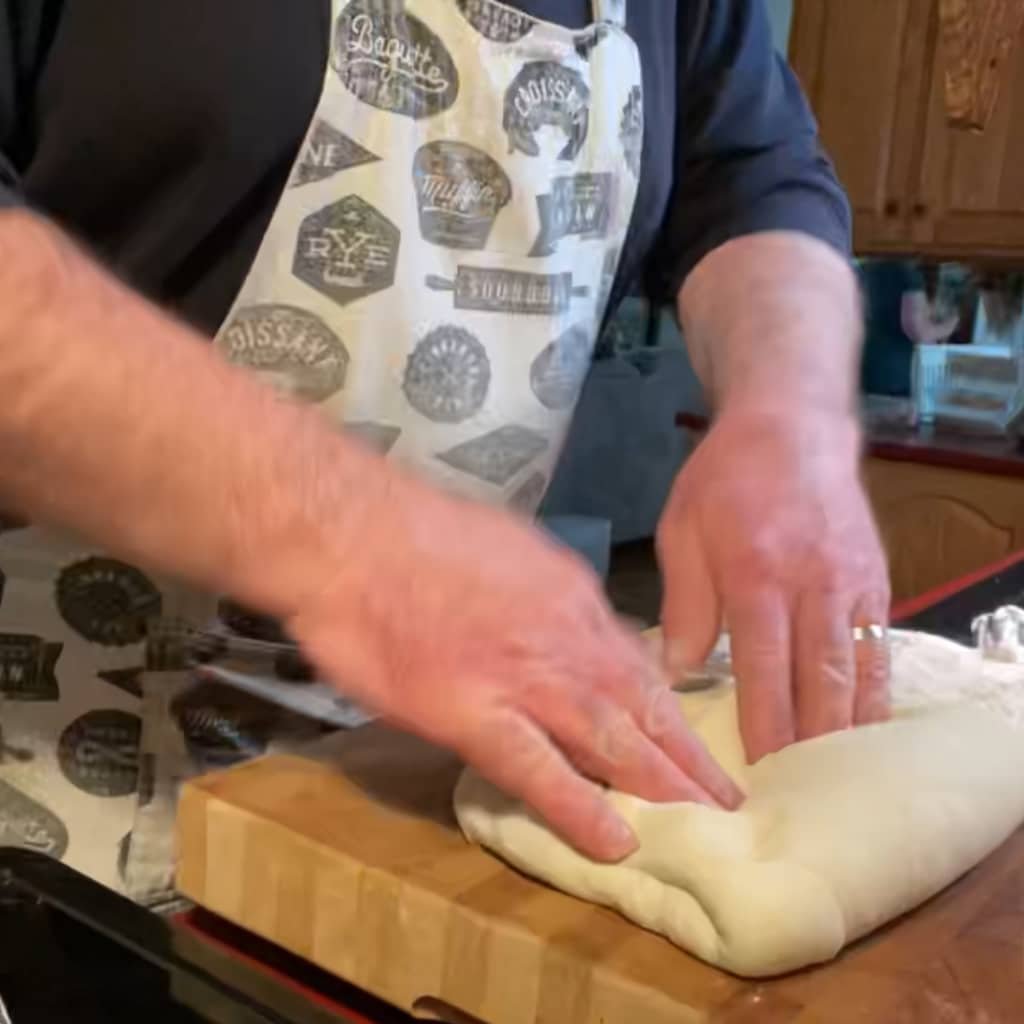
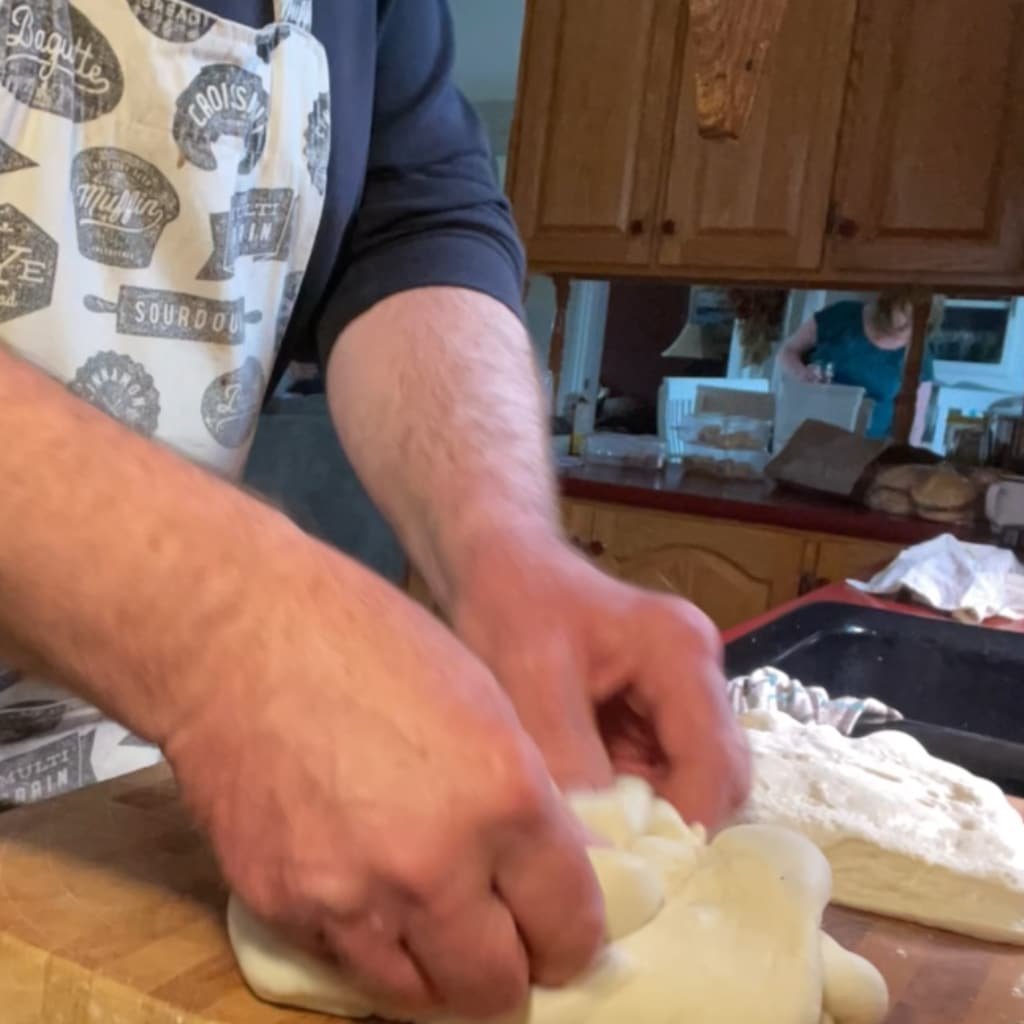
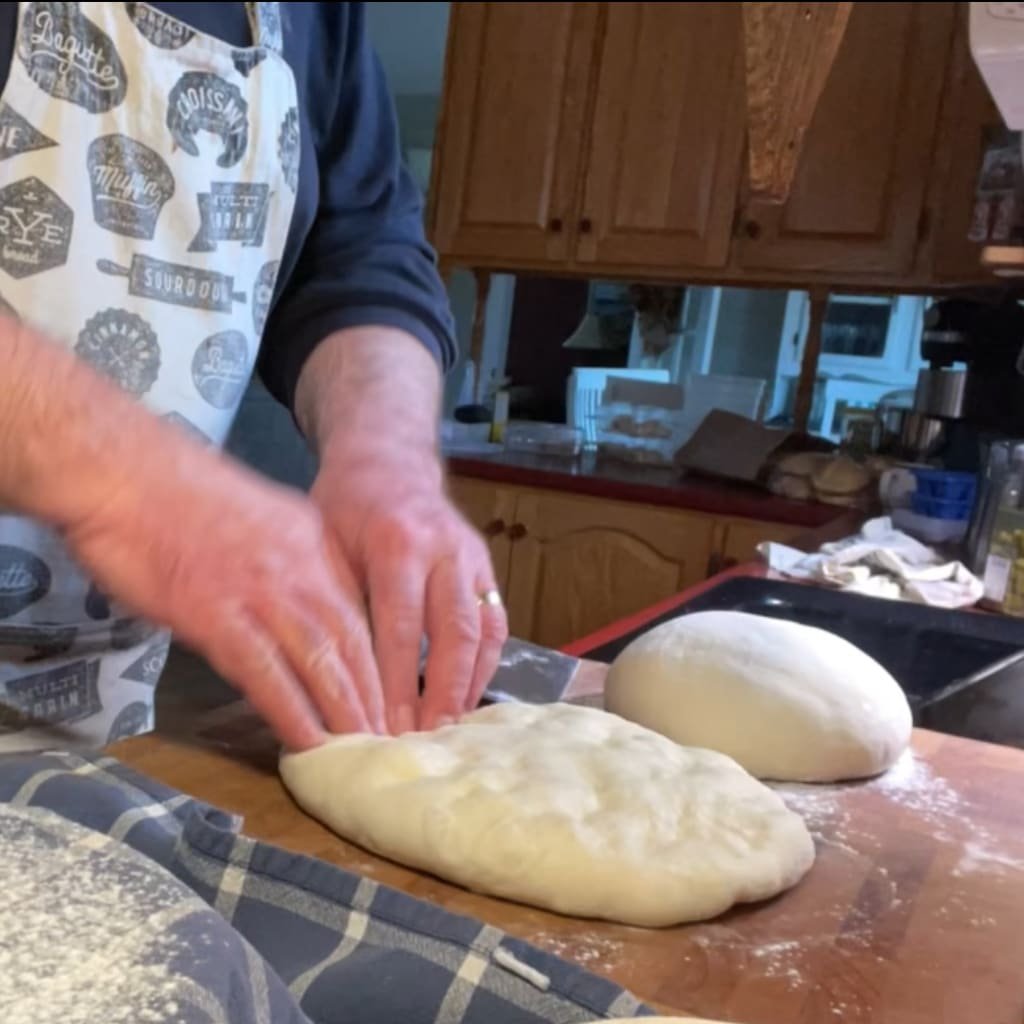
- Shape the first piece into a rough rectangle, with a short edge towards you. Picking up the corners of the short edge away from you, stretch the dough a little and fold ⅓ of the dough back on itself and with your fingers, lightly seal the point where the edge meets the dough.
- Now pick up the corners of the short edge closest to you, stretch a little again, and fold that part of the dough on top of the rest of the dough to the edges join. Again, seal it lightly with your fingers.
- Now turn the dough 90 degrees. You now again have a short edge towards you. Repeat the above process steps, and you should now have a rough square of dough much thicker than you started with.
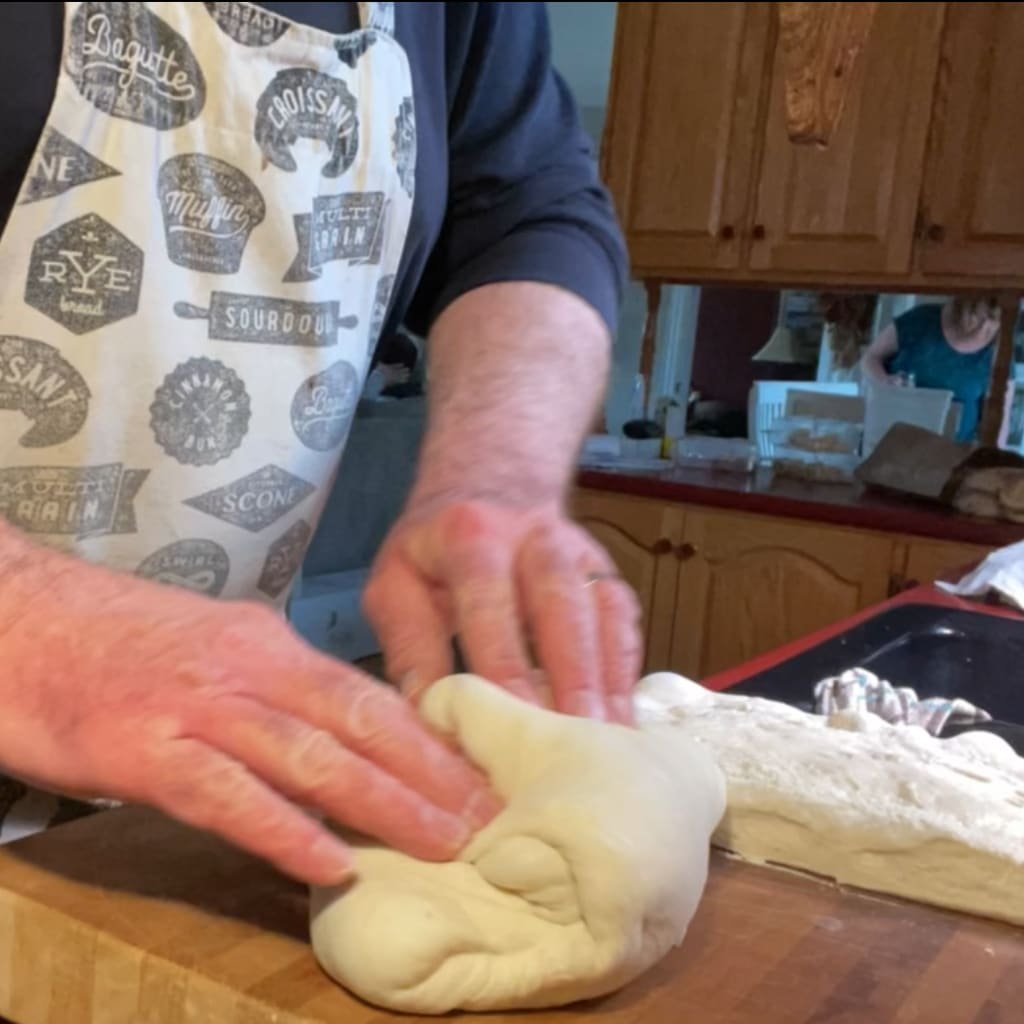
- Place one hand on top of the dough, and pick up a corner with your other hand. Stretch the dough a little and pull it back to the center of the dough. Turn the dough 90 degrees, and repeat. Repeat twice more, then pick up the dough and turn it over.
- You’ll now have the seam down and the good side up.
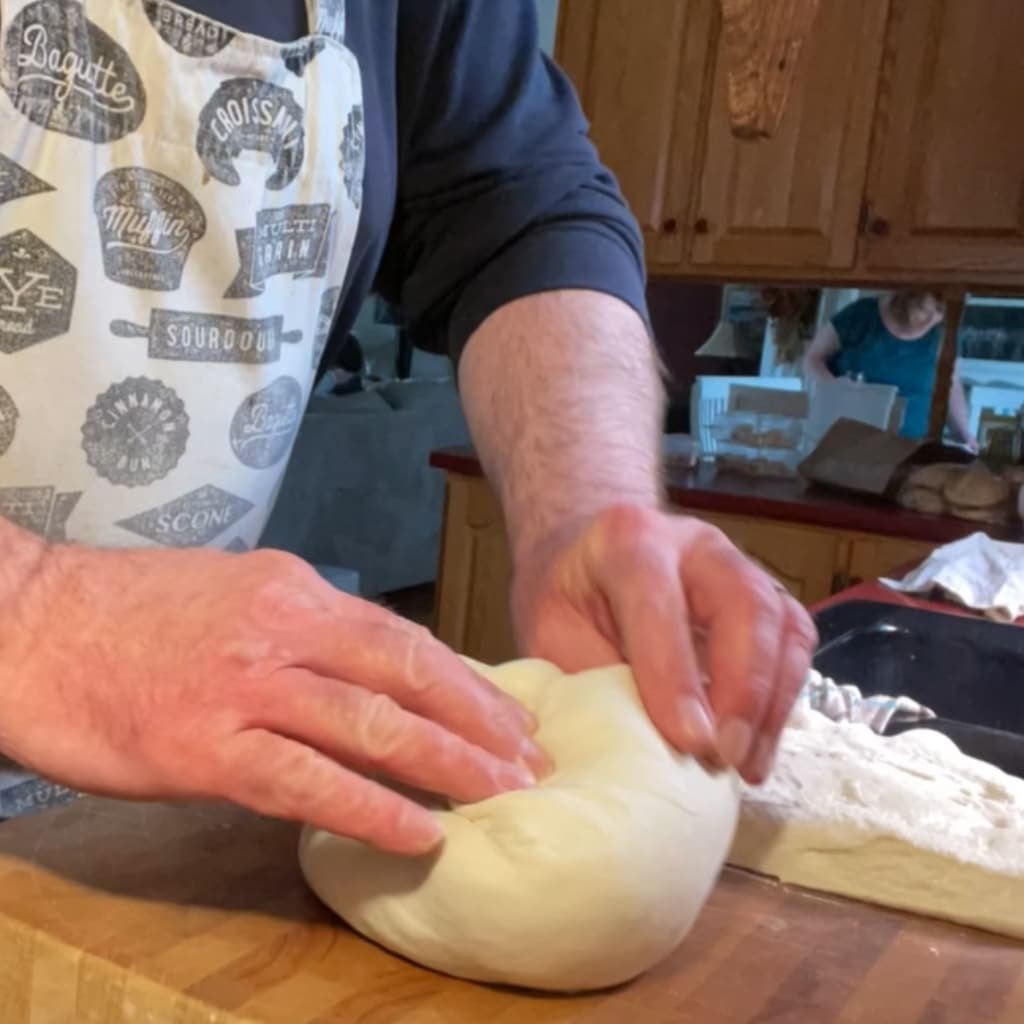
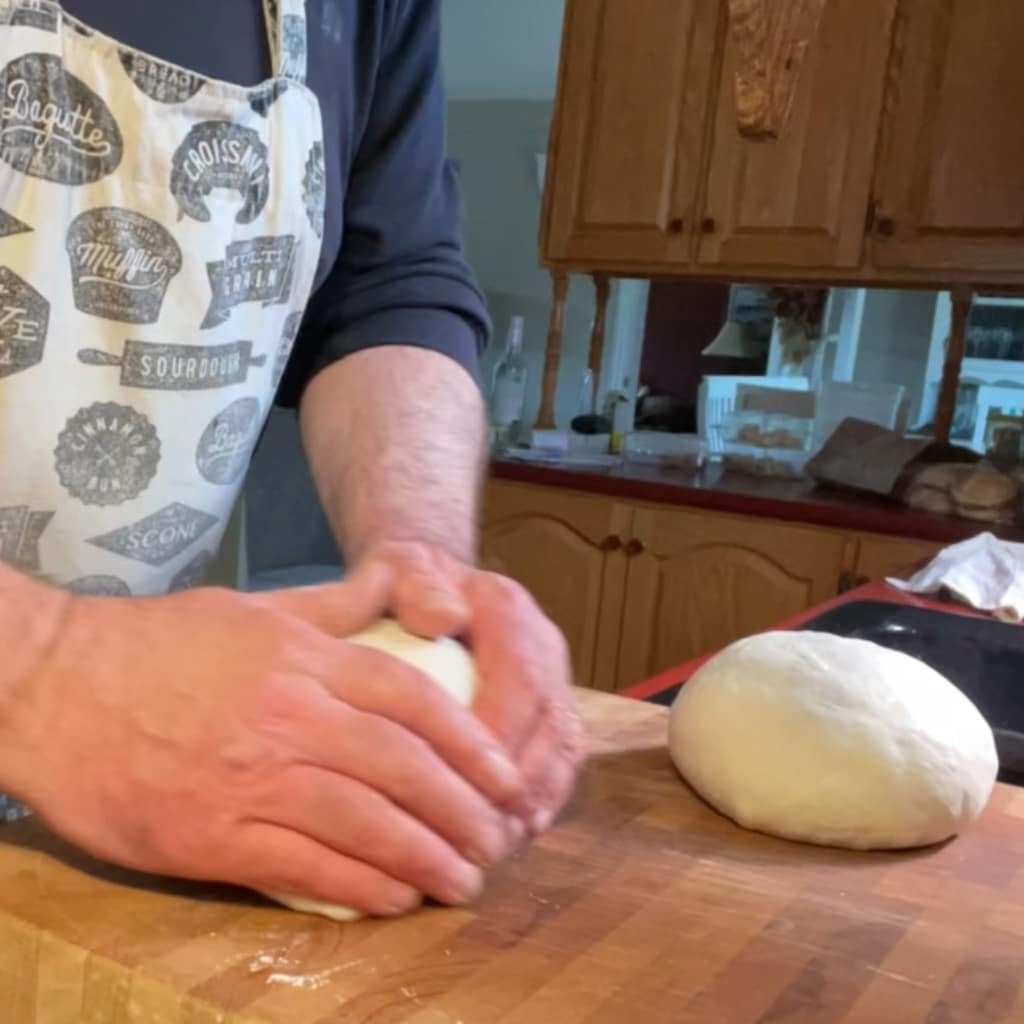
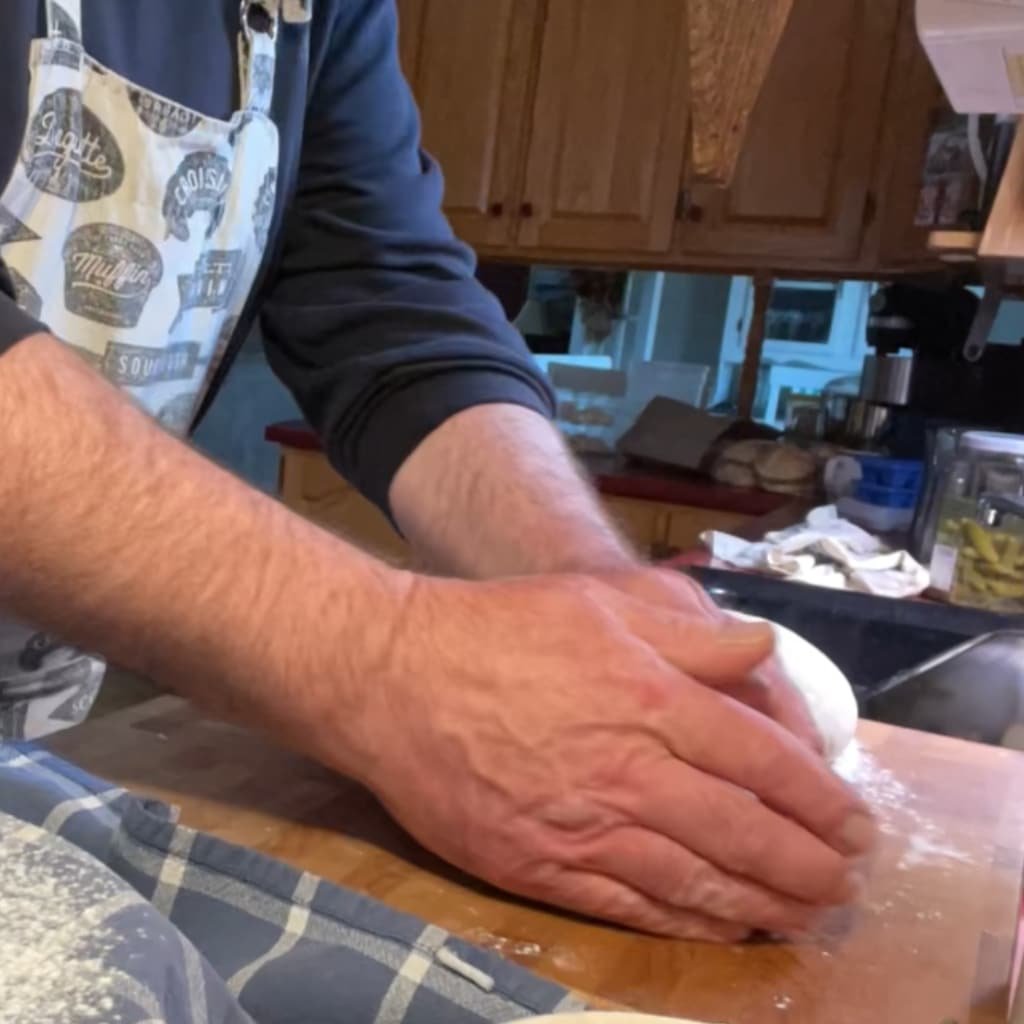
- Now you want to add a little tension to the dough. With your thumbs on top of the dough close together and your pinky fingers on the work surface, cup the dough in your hands, press down lightly and pull the ball of dough towards you slightly.
- The dough shouldn’t slide easily. You should feel the dough drag slightly and you should feel the dough skin tighten slightly.
- If you don’t feel this, brush off the flour from the seam side of the dough and your work surface and try again. If you still don’t feel the drag and the dough tighten, press down a little harder.
- (NOTE: This step is tough to master. It’s totally a feel thing and I remember how hard it was to get right. Don’t get frustrated, you’ll get it. It just takes some practice.)
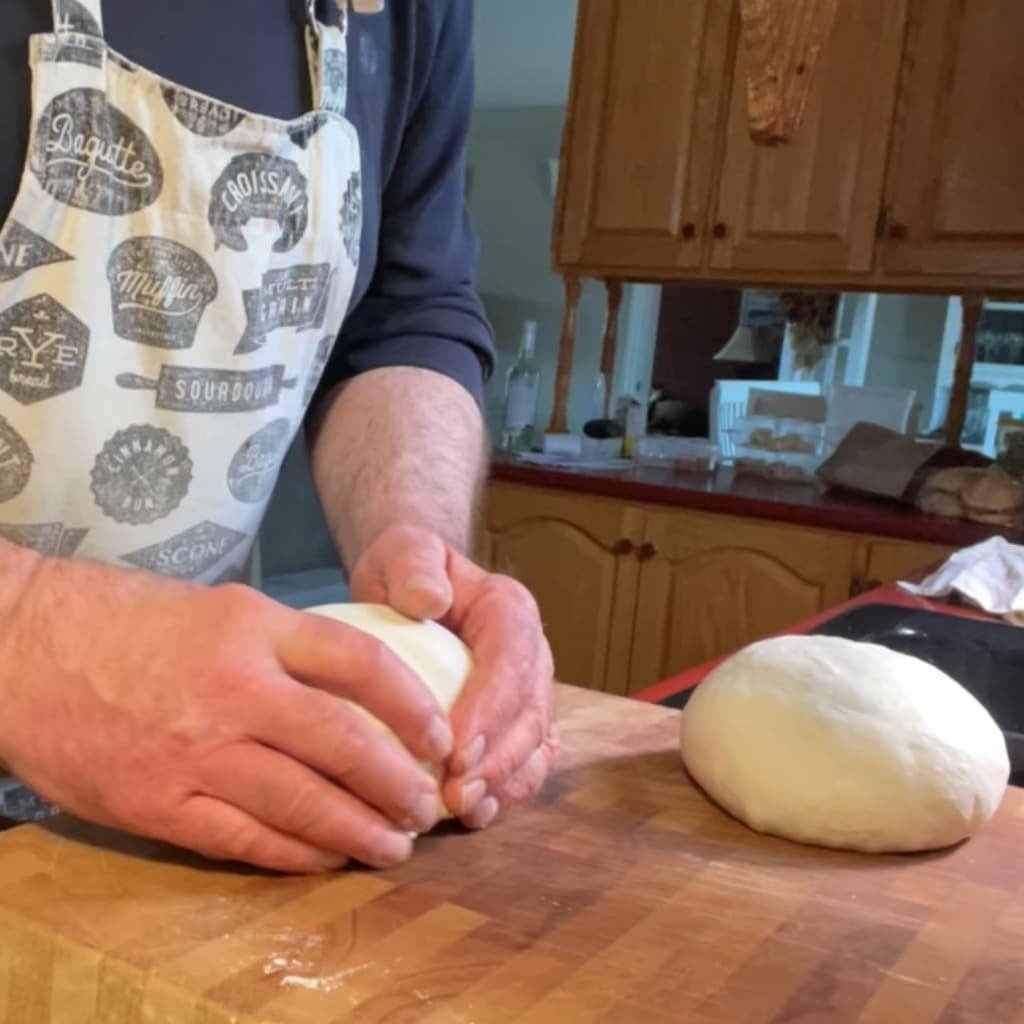
- You want to keep pressure and friction here to successfully seal the seam, which will help the dough retain its shape through proofing and baking.
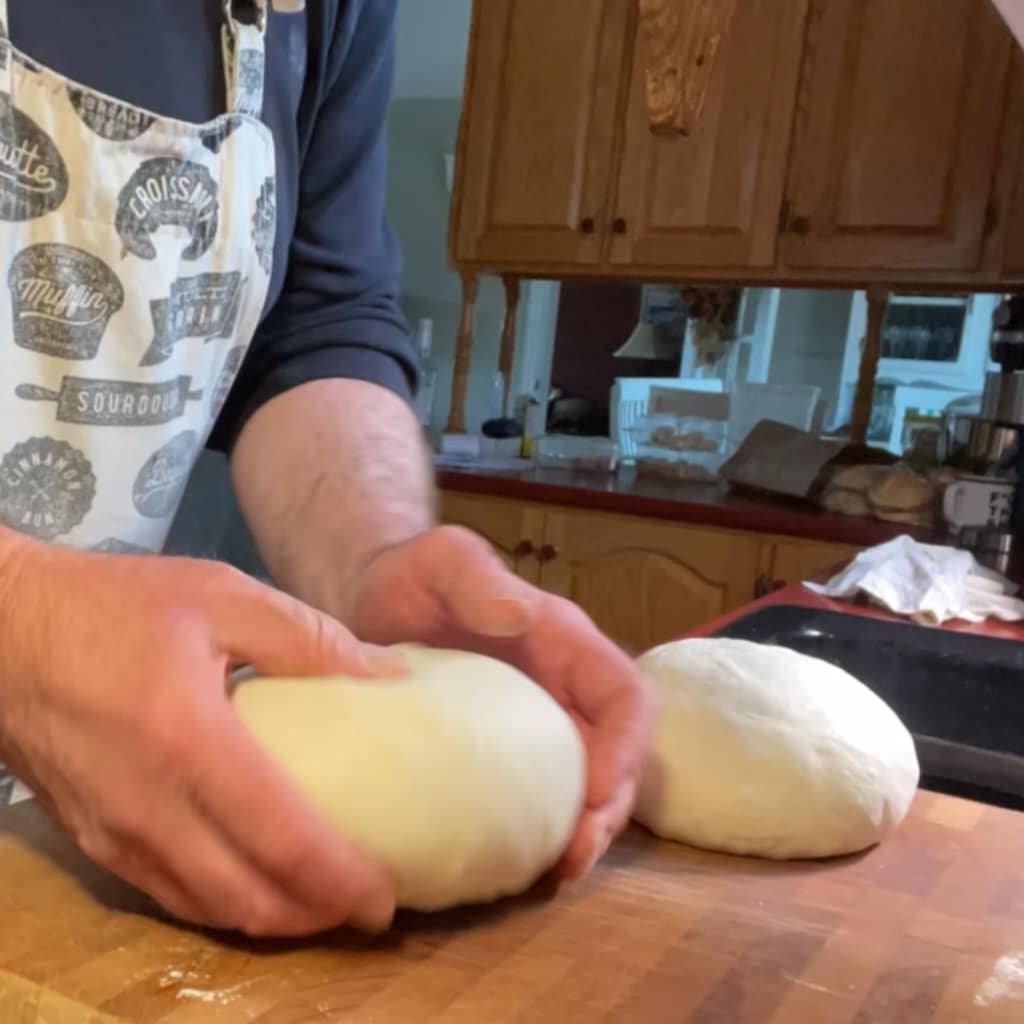
- Turn the dough 90 degrees and repeat, and repeat twice more. Repeat the whole process with the other section of your dough. Leave both dough balls seam down on the work surface, sprinkle a little flour over them and cover with a clean dish towel. Leave it to rest for 20 to 30 minutes.
- That’s the preshape stage, and the rest period allows the gluten to relax and the dough to equalize in temperature.

Now for the shaping stage.
- This is the same as the preshape, but now you’re starting with a nice smooth round ball of dough instead of a rough mass of dough that’s a bit sticky on top after you turn it out of the bowl. At this point, try to get away without using any flour. You may need to use a little, but try not to.
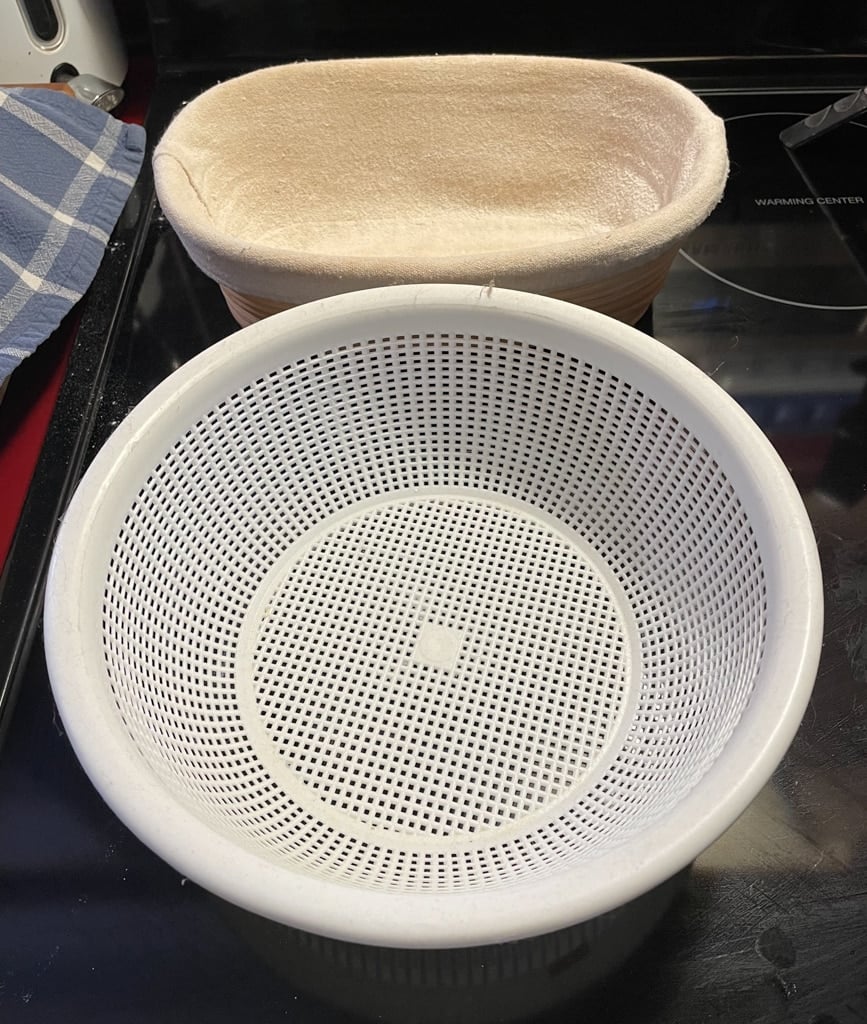
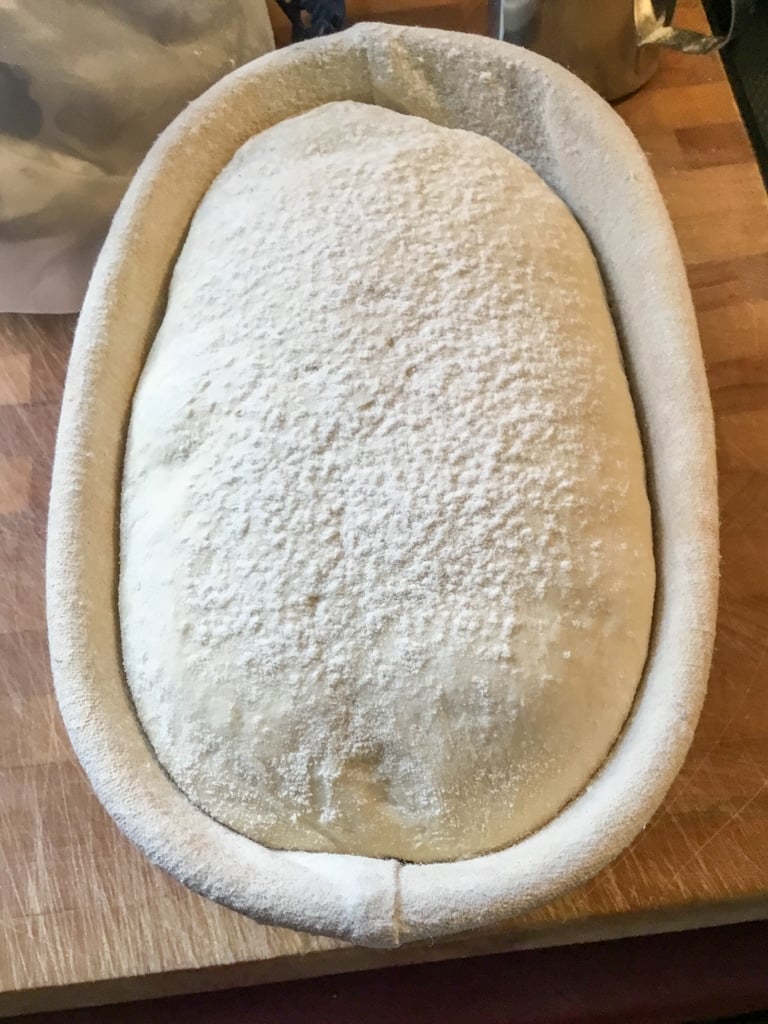
- A basket for proofing dough is called a banneton. I have them made out of wicker and also from round cane.

- These will help the dough keep its shape during proofing and will wick moisture away giving you a slight skin on the dough without drying it out too much.
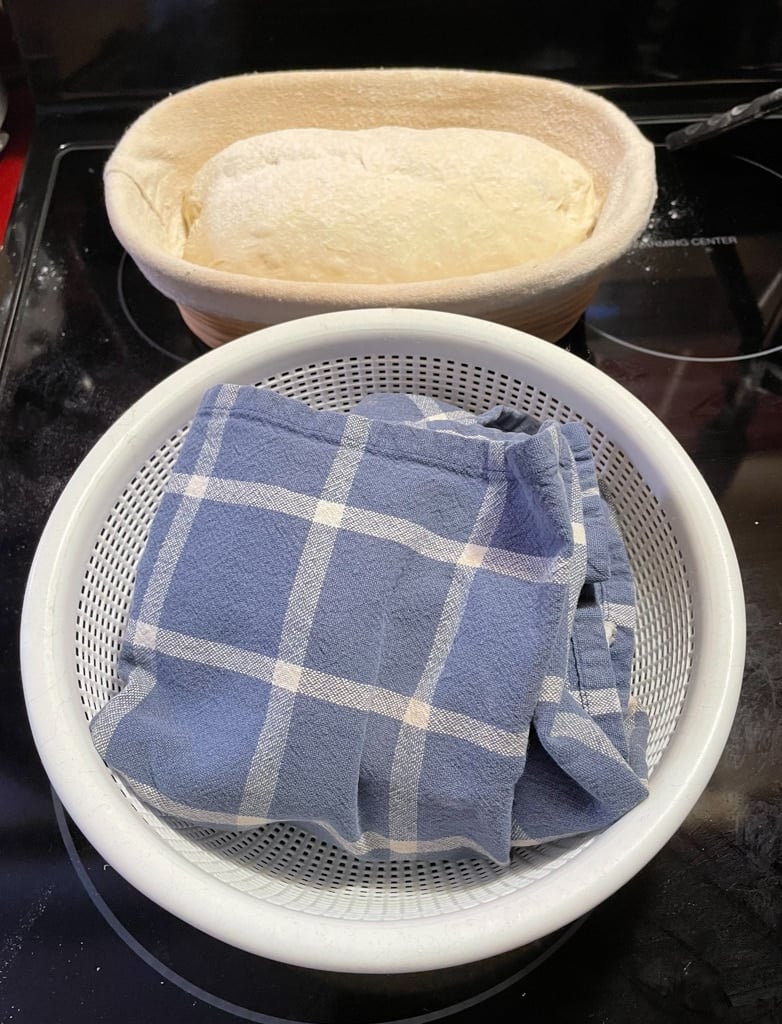
- I would highly doubt you have any of these lying around, so you’ll need to improvise. Your local dollar store or craft store will have baskets made of wicker or plastic in various shapes, round, oval, square, whatever.
- You see here in the pictures I’m using a plastic dollar store colander and a clean dollar store dish towel. Not as pretty or fancy, but they work. For these instructions, that’s what I’m using.
- Spread the towel over the colander or basket and sprinkle brown rice flour over the towel where the dough will touch it.
- Pick up a ball of dough using the bench knife or bowl scraper, clean any flour off the work surface and put the dough down with the seam side up and good side down.
- Repeat the preshape process above with each ball of dough, and when you have the shaping completed, place it seam side up on the towel over the basket and gently drop it in.
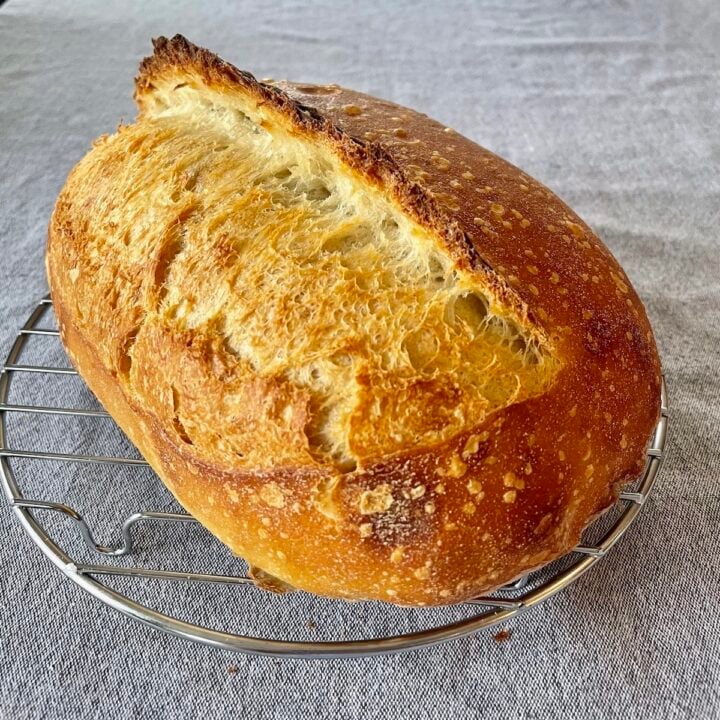
- Sprinkle rice flour over the dough and fold the towel over the dough neatly. That’s shaping a “boule”, or round loaf.

- For a “batard”, or oval loaf, the shaping process is slightly different.
- You’ll start off the same, flattening the dough into a rough rectangle with a short edge towards you. Pick up the corners of the edge closest to you, lift and pull towards you, slightly stretching the dough. Fold ⅓ of the dough away from you on top of the dough, and seal as previous.
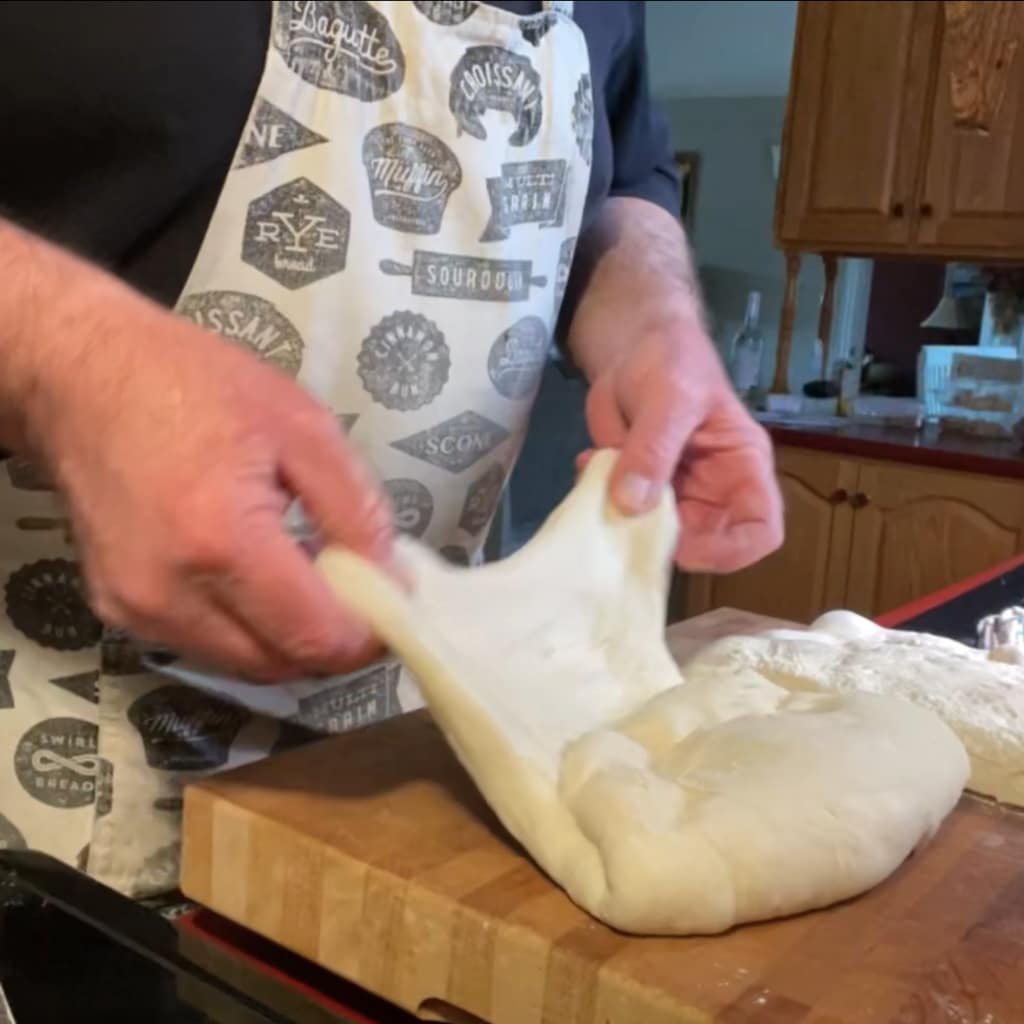
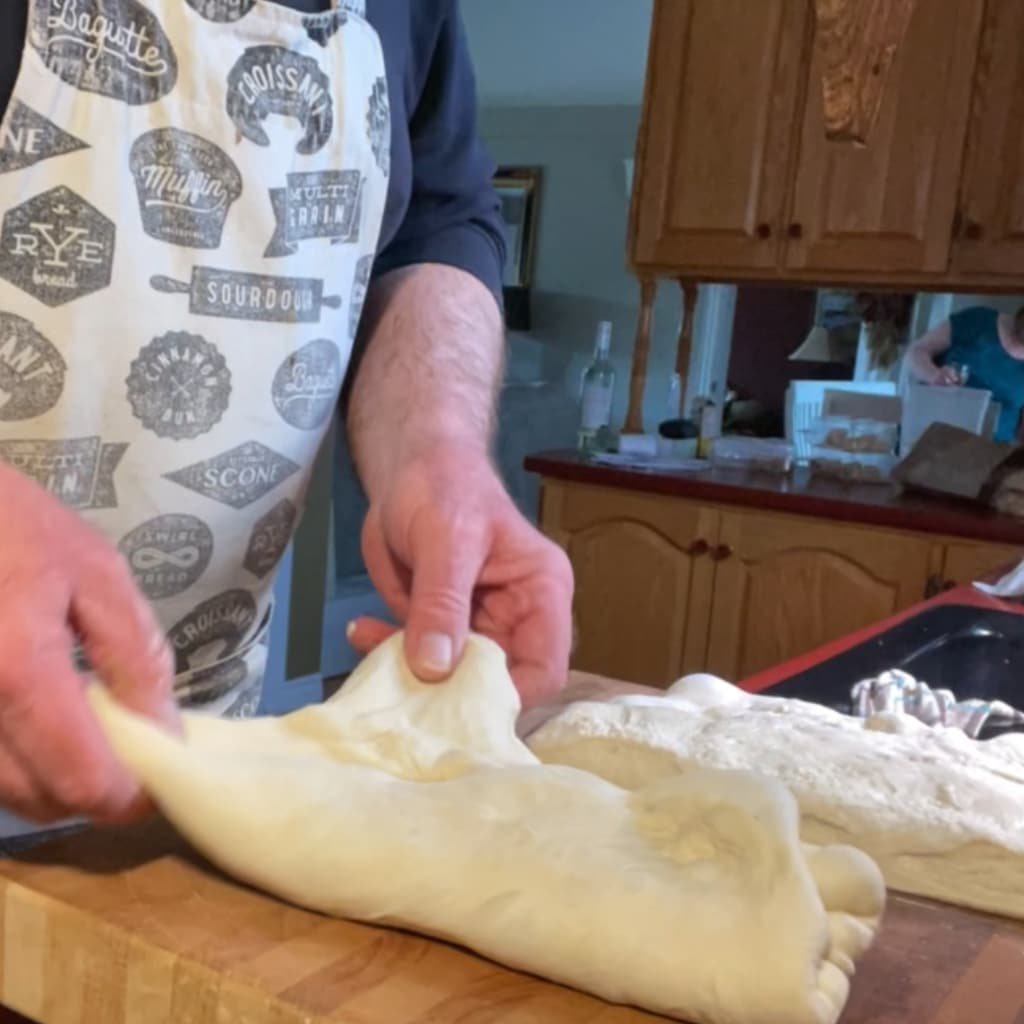
- Now pick up the new corners you have and stretch the dough by moving your hands away from each other until you feel some resistance. (I like to call these “wings”!)
- Bring the dough in one hand back in, folding ⅓ of the dough towards your other hand, and then bring that hand in, laying that part of the dough on top of the dough that was in the first hand. Seal all this using your fingers.
- Now, using both your hands, you’ll roll the dough up into a sort of a tight short cylinder. (It may help to practice this motion with a folded dish towel.)
- Using your hands to fold the dough in place and tight, use your fingertips to hold pressure on the seam (which should be on the bottom) to seal it. Place the dough in the basket with the towel over it, sprinkle some rice flour on the dough, and fold the towel over it neatly.
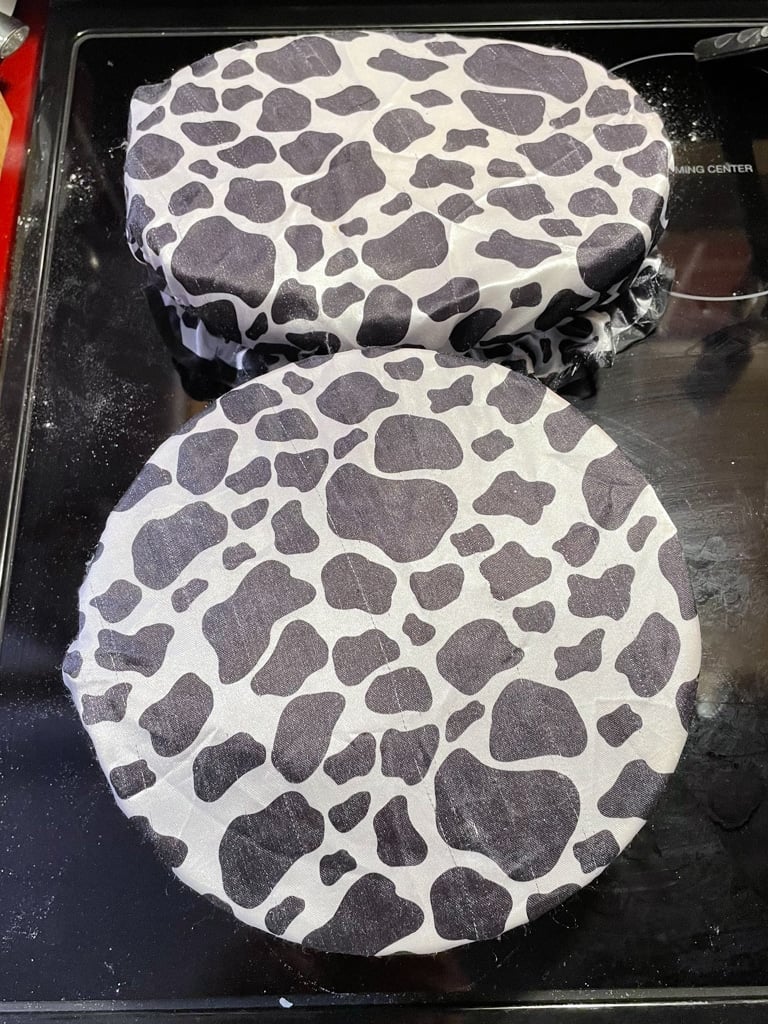
- Now you’ll need to cover the “basket” of dough with something. A large plastic bag (like the ones you get at the produce section of your grocery store) works, but I love using dollar store shower caps. I highly recommend them.
- Now the dough is in the proofing stage.
- Depending on numerous factors, like temperature of the dough, ambient temperature, the health and strength of your starter, etc, the time before putting the dough in the fridge might be an hour, and it might be 3 hours or more.
- This is something that will depend on YOUR dough and area. There is no guide for this, it’s a trial and error thing.
- Now put your dough in the fridge, and leave it for at least 8 hours, preferably at least overnight.
Baking your dough!
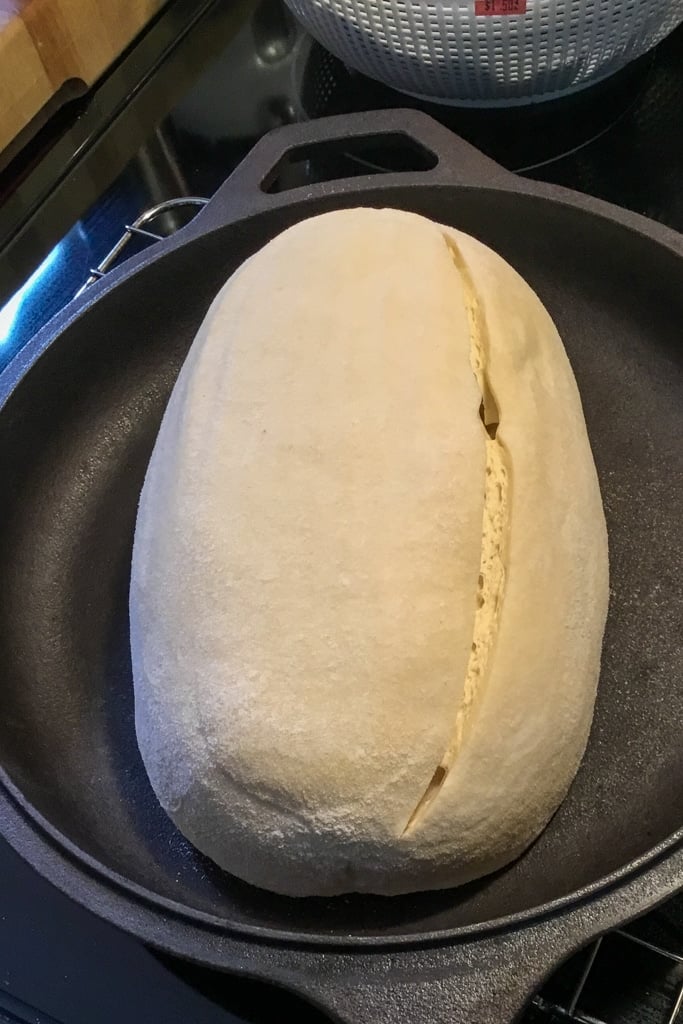
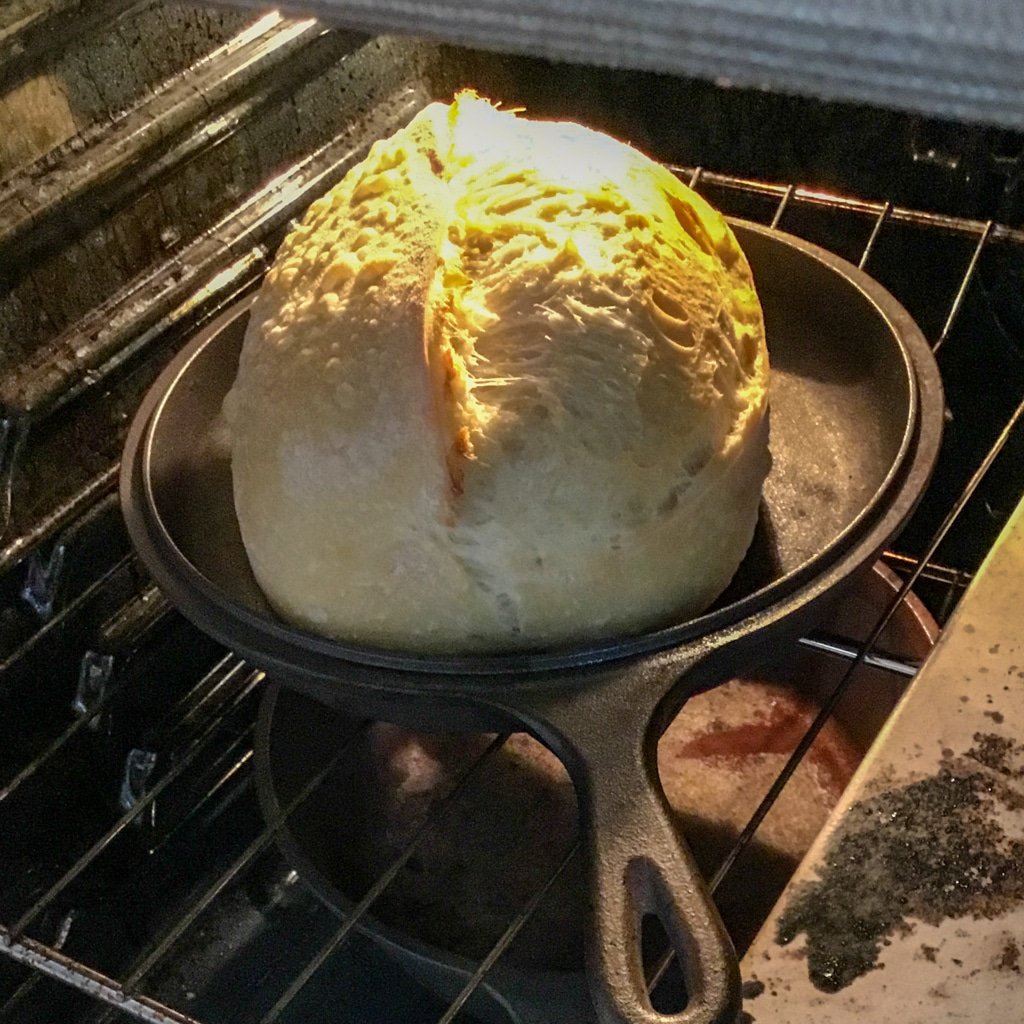
- My absolute favourite way to bake dough at home is in my 3.2 qt Lodge combo cooker.
- Even a professional baker like Chad Robertson of Tartine fame recommends these. This is the home method that by far comes closest to replicating a professional stone deck bread oven.

- I’m also going to show you the method I started with, a stone and stainless steel bowl. Bread baked at a high temperature needs steam to keep the crust from setting too early and allowing it to rise properly in the oven. (Most call it oven spring, you’ll also see references to oven kick!)
- (NOTE: The internet is rife with wacky ways of getting steam in your oven so you don’t need a baking vessel. Don’t! Just PLEASE DON’T! Domestic ovens are designed to vent steam so you’re fighting a losing battle. You’ll see references to pans of boiling water, ice cubs tossed in the bottom of the oven, cast iron pans fulled with chain or lava rock, preheated and boiling water poured over them, etc. All are unsafe, not only to you, but the oven and all it’s electronics as well.)
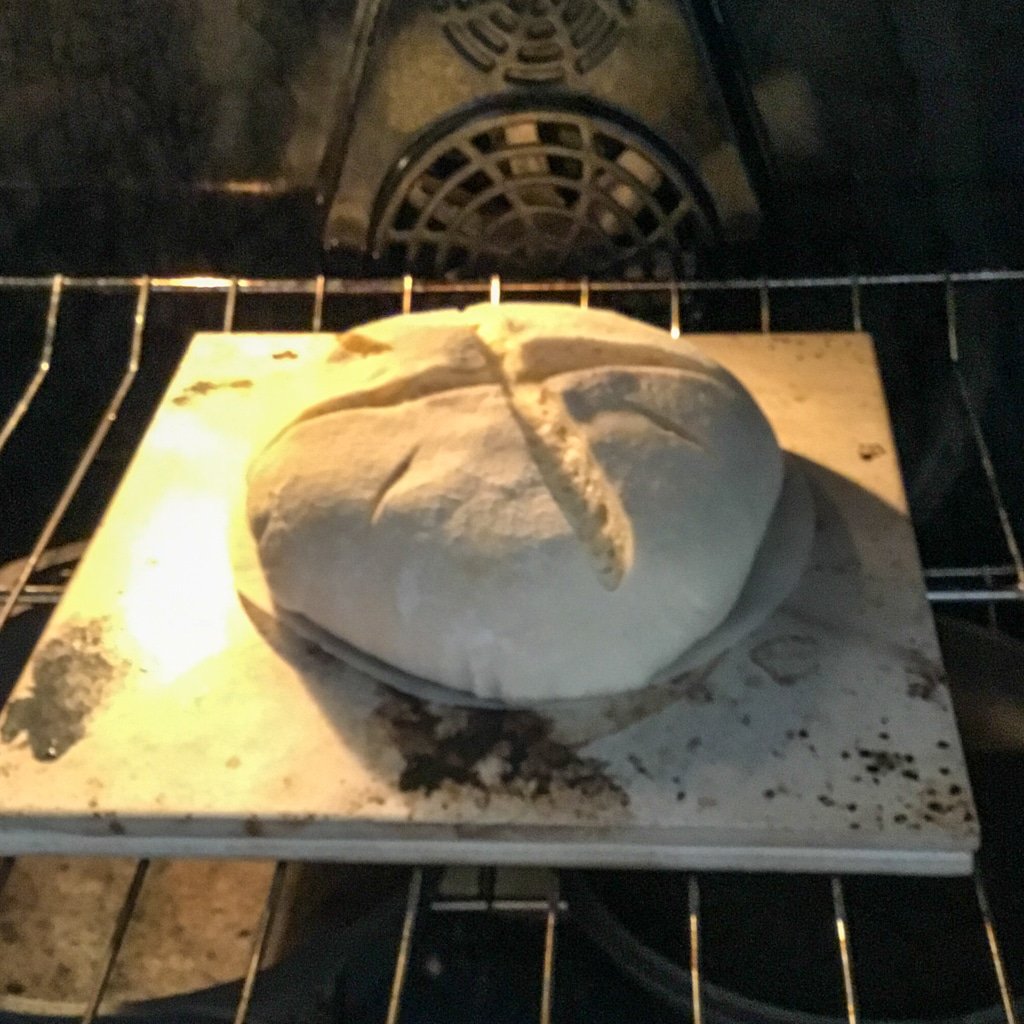
- Some of you may already have a pizza stone or baking steel, but even a 12” ceramic flooring tile will work.
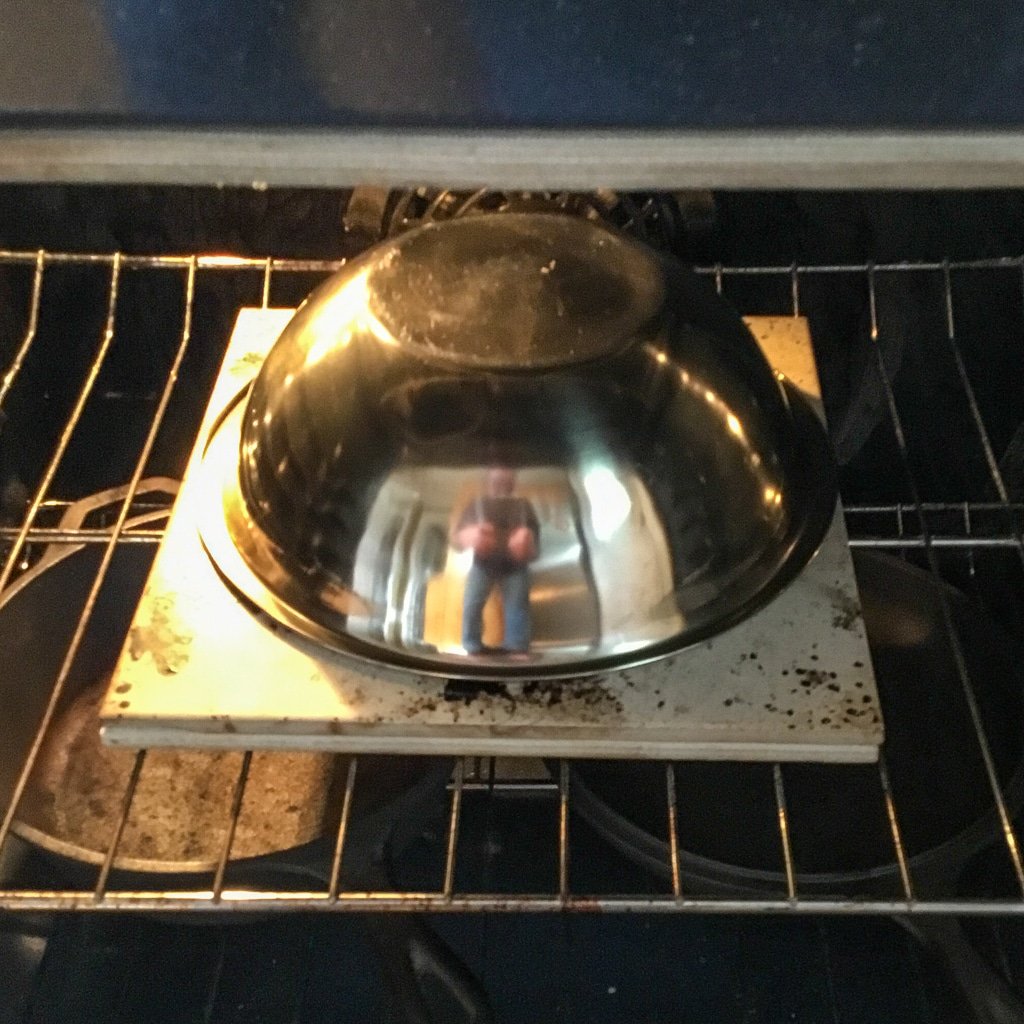
- To provide a somewhat sealed environment to allow the bread to provide its own steam, you’ll need it covered. You’ll see here I’m using a stainless steel bowl to cover it with.
- If the stone / steel is flat and the bowl isn’t twisted or warped, it will provide a sufficient seal. These instructions will refer to a flat surface and a stainless bowl for simplicity.
- Now, safety first: you’re dealing with metal and stone / ceramic objects heated to 475 ° F. Instant burn and a “baker’s tattoo” isn’t something to be proud of.
- I’ve seen some pretty disturbing pictures of people’s hands where they absentmindedly grabbed the handle of a cast iron pan with a bare hand. Trust me, you don’t want to experience this, so do not rush, don’t get distracted, and keep your wits about you.
- Preheat your oven to 475° F with the steel or stone in there. Wait at least 10 minutes after the oven signals it’s at temperature.
- (NOTE: Domestic ovens are notorious for having incorrect temperatures. Your first loaves may be light, or they may be too dark. They may bake faster, they may take longer. Again, it’ll vary from oven to oven and only experience will tell you what your oven will do!)
- Remove your loaf from the fridge. Unwrap and uncover it, and sprinkle some rice flour over it.
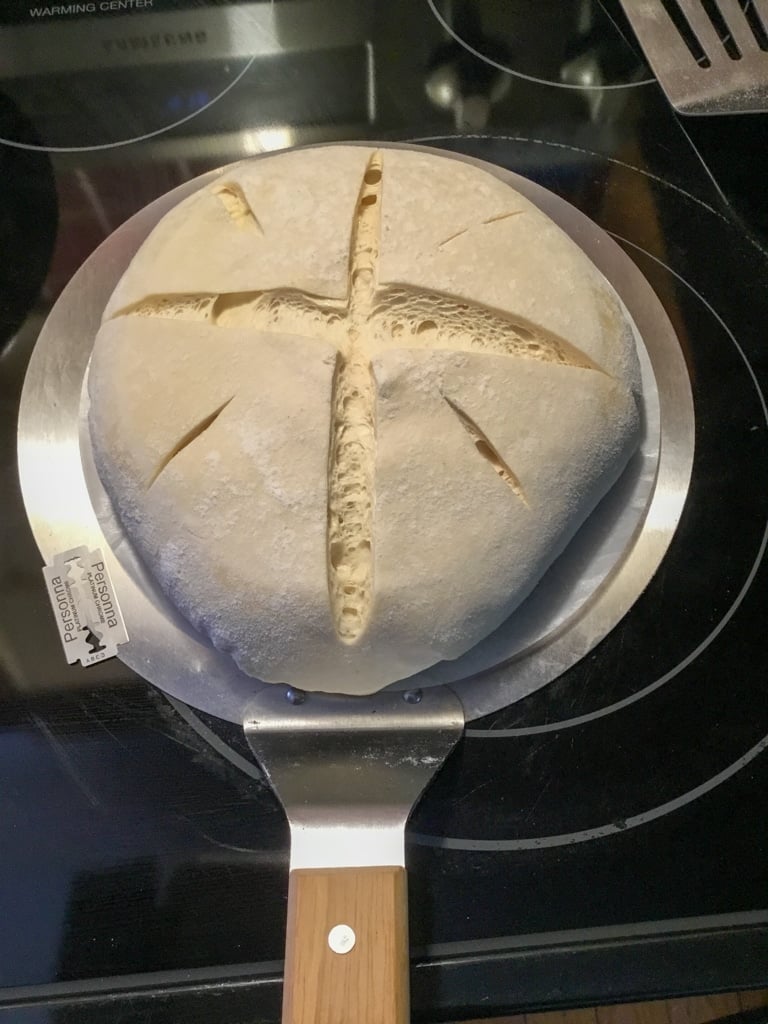
- I’d recommend using a round of parchment paper between the loaf and the baking surface for your first few times. Invert the loaf (seam down) onto a pizza peel (an upside down sheet pan or cookie sheet will suffice) and slash the loaf.
- Bread will expand in the oven and it’s going to need some place to expand. You don’t want the bread to decide on it’s own where it’s going to give you an unsightly blowout.
- You have the opportunity to give it a place to expand properly, so use it. It can be as fancy or as simple as you want it.
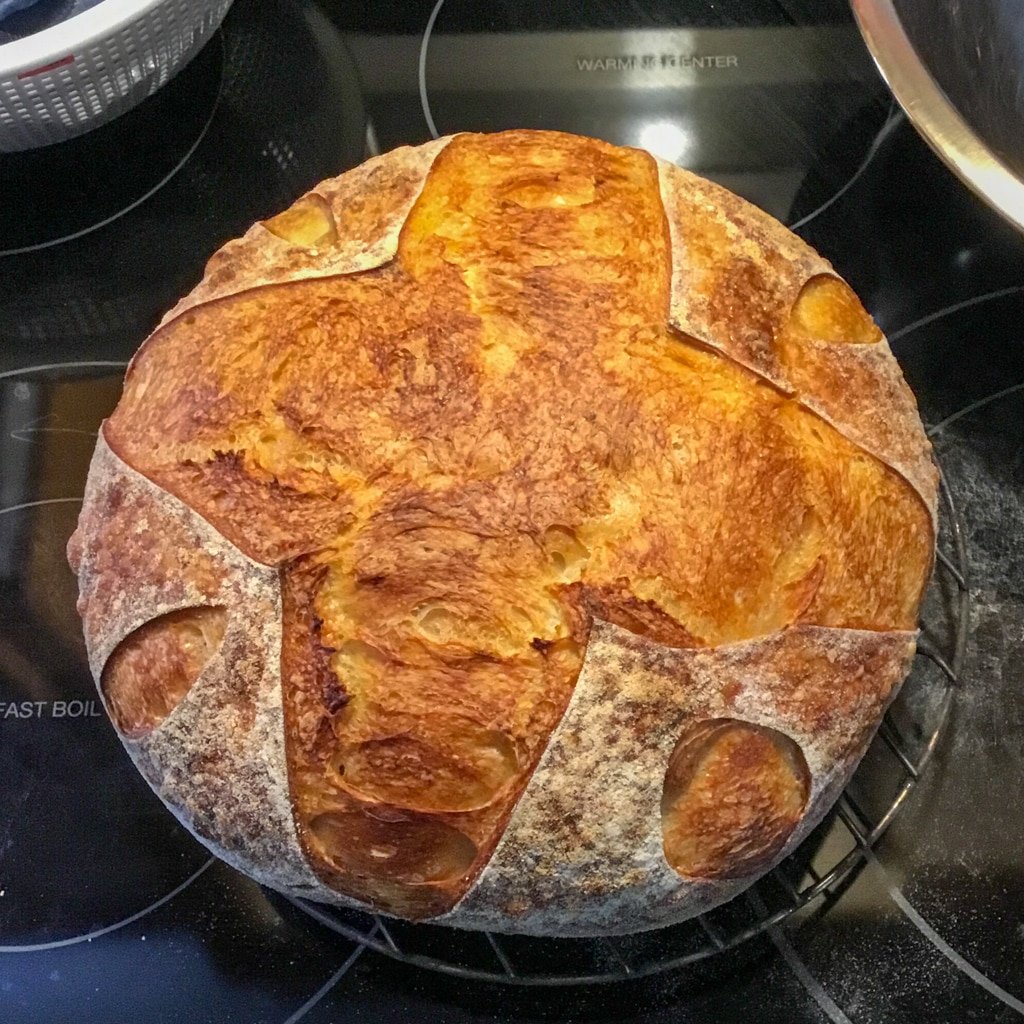
- On a batard, as simple slash will suffice, where on a boule, an X or a square cut on top works best.
- A razor blade is by far the best tool, but a utility knife with a clean new blade will do the job. Most kitchen knives aren’t sharp enough to cut dough cleanly.
- Slide the loaf onto the stone and quickly cover the loaf with the stainless bowl, taking care that the bowl is centered over the loaf and the bowl isn’t overlapping the edge of the baking surface. Remember, you want it sealed.
- Set a timer for 20 minutes.
- Then remove the bowl covering the loaf (it’s hot, remember) or the cast iron combo cooker and set a timer for 15 minutes. Unless your oven is running quite hot, the crust will still be too light.
- Keep checking every couple of minutes for desired crust colour. Be careful, once the crust starts to darken, it gets darker quickly.
- Remove the loaf from the oven and place on a cooling rack. Try to wait for the loaf to fully good before cutting into it (I know, it’s hard to do) but the center of the loaf needs time to properly set.

Conclusion!
This process seems long and drawn out, and there’s no doubt it it but if you think about it, the actual hands-on time is minimal. I would doubt that for 2 loaves, once you get used to the way things work and the flow, there is actually 30 minutes of your time in it.
The rewards are many. From the simple enjoyment of the depth of flavours of the loaf, to the emotions that come with “I did this! I did it with my own hands and from only 3 simple ingredients!” Call it ego, call it what you want, but it’s truly a special feeling when you bite into a slice of your first successful loaf.
Most important, this is a very steep learning curve. You’ll learn a level of patience you didn’t know you had.
You’ll grow a special affection for your starter. It’s like a pet that you created. Take care of it, feed it regularly and you’ll be rewarded.
It's easy to keep up with the latest home style cooking & baking ideas from Rock Recipes. Be sure to follow Rock Recipes Facebook Page and follow us on Instagram.
Plus you'll see daily recipe suggestions from decadent desserts to quick delicious weekday meals too.
You can also sign up for our FREE newsletter to know immediately when we add new recipes. You'll also get weekly suggestions for great family friendly meals and desserts too!

Rock Recipes a participant in the Amazon Services LLC Associates Program, an affiliate advertising program designed to provide a means for us to earn fees by linking to Amazon.com and affiliated sites. Our product recommendations are almost exclusively for those we currently use or have used in the past.
Would you like to save this recipe?
Send this recipe to my email.


Brilliant set of instructions! Thankyou!!
Can you please post more sour dough recipes? Both sweet and savory.
Thank you, Cheryl Glover, USA