
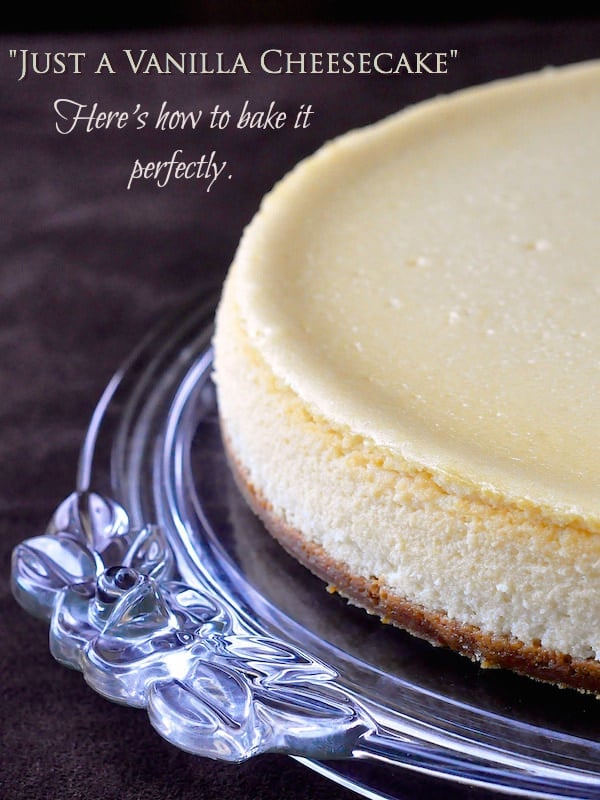
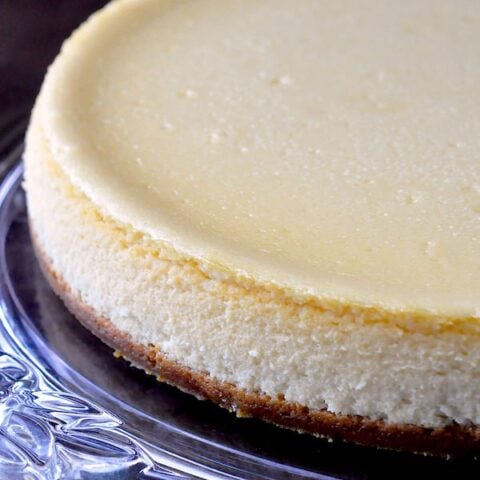
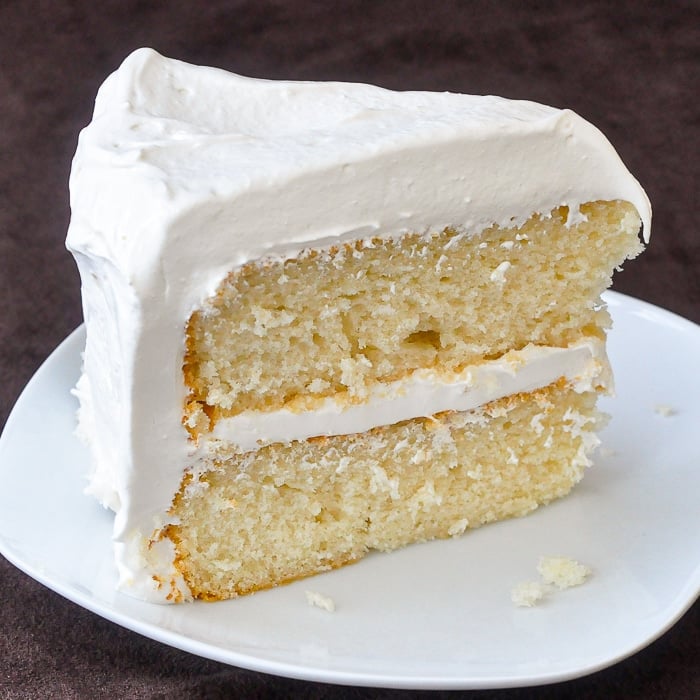
How to Bake the Perfect Cheesecake Every Time or "Just a Vanilla Cheesecake"
Would you like to save this recipe?
Send this recipe to my email.
Learning how to bake the perfect cheesecake is all about quality ingredients, an uncomplicated recipe and mastering the simple method.

I recently had a conversation with one of our readers who was so nervous about baking a cheesecake for her husband's birthday. She had previously encountered a couple of cheesecake disasters.
Understandably, she was not relishing the thought of ruining the centrepiece of the birthday celebration. I convinced her to do a practice run with a "just a vanilla cheesecake" to get a feel for the process of baking the perfect cheesecake.
Following this recipe and instructions she was delighted to perfectly bake both the practice cheesecake and the second as hubby's birthday cake.
The advantage of learning with "just a vanilla cheesecake" is that it is very simple to prepare with uncomplicated ingredients. Also, you get a good feel for the proper consistency of a cheesecake batter.
It is also relatively easy to tell when a vanilla cheesecake is done. If the top of this cheesecake begins to brown at all, in all likelihood it is fully baked.
Although as the recipe states, it need not brown at all to be fully baked. I give the pan a little shake to test how much it wobbles after about an hour.
It is best to treat a cheesecake like a large baked custard which it really is. Residual heat will take care of any slightly wobbly centre even after it comes out of the oven.
In my opinion, baking the perfect cheesecake requires the use of a bain marie during baking.
A bain marie is simply a water bath that buffers the direct heat from the sides and bottom of the baking pan. This helps the cheesecake bake more evenly.
I bake my cheesecakes in a 9 inch spring form pan that has the bottom and sides wrapped in multiple layers of wide heavy duty aluminum foil. Therefore it forms a sort of boat that the cheesecake pan sits in.
The roll of aluminum foil that I use is about 16 inches wide. I use at least 4 layers of foil to make sure that no water leaks in and ruins the crust of my cheesecake.
The aluminum foil wrapped pan is then placed inside a larger baking pan; I use a 12 inch cake pan. Boiling water is then poured into the larger pan filling it from ½ to ⅔ of the way to the top.
I find it best to pour the boiling water into the pan after it is placed on the rack in the oven. Then, you are less likely to splash water onto the cheesecake or inside the aluminum foil.
I reuse the aluminum foil for several future cheesecakes, adding a couple of layers to it each time just to be safe.
I still recommend that you use the aluminum foil wrap around the cheesecake pan. The aluminum foil still offers a good buffer to the heat. High heat and baking too quickly is the main reason that a cheesecake becomes dense and not creamy.
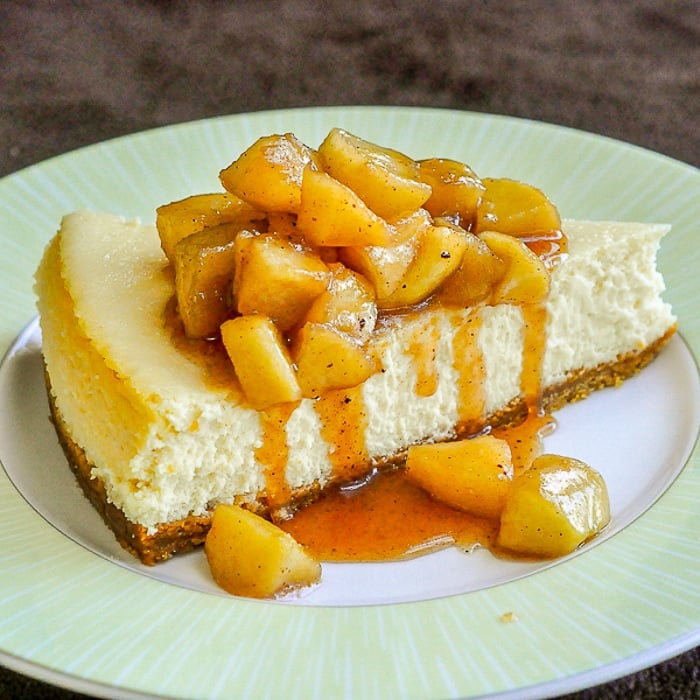
The recipe for the Maple Apple Topping on the cheesecake above can be found here: Maple Apple Cheesecake.
Like this Cheesecake recipe?
You'll find hundreds of other sweet ideas in our Cakes & Pies Category and even more in our Desserts Category.
It's easy to keep up with the latest home style cooking & baking ideas from Rock Recipes. Be sure to follow Rock Recipes Facebook Page and follow us on Instagram. Plus you'll see daily recipe suggestions from decadent desserts to quick delicious weekday meals too.
You can also sign up for our FREE newsletter to know immediately when we add new recipes. You'll also get weekly suggestions for great family friendly meals and desserts too!

Rock Recipes a participant in the Amazon Services LLC Associates Program, an affiliate advertising program designed to provide a means for us to earn fees by linking to Amazon.com and affiliated sites. Our product recommendations are almost exclusively for those we currently use or have used in the past.
How to Bake the Perfect Cheesecake Every Time or "Just a Vanilla Cheesecake"
How to Bake the Perfect Cheesecake Every Time or "Just a Vanilla Cheesecake" - Learning how to bake the perfect cheesecake is all about quality ingredients, an uncomplicated recipe and mastering the simple method.
Ingredients
For the cookie crumb crust
- 1⅓ cups graham cracker crumbs
- 3 tablespoon sugar
- ⅓ cup melted butter
For the cheesecake batter
- 3 eight ounce packages ounces cream cheese, (3 cups)
- 1 cup sugar
- 3 eggs
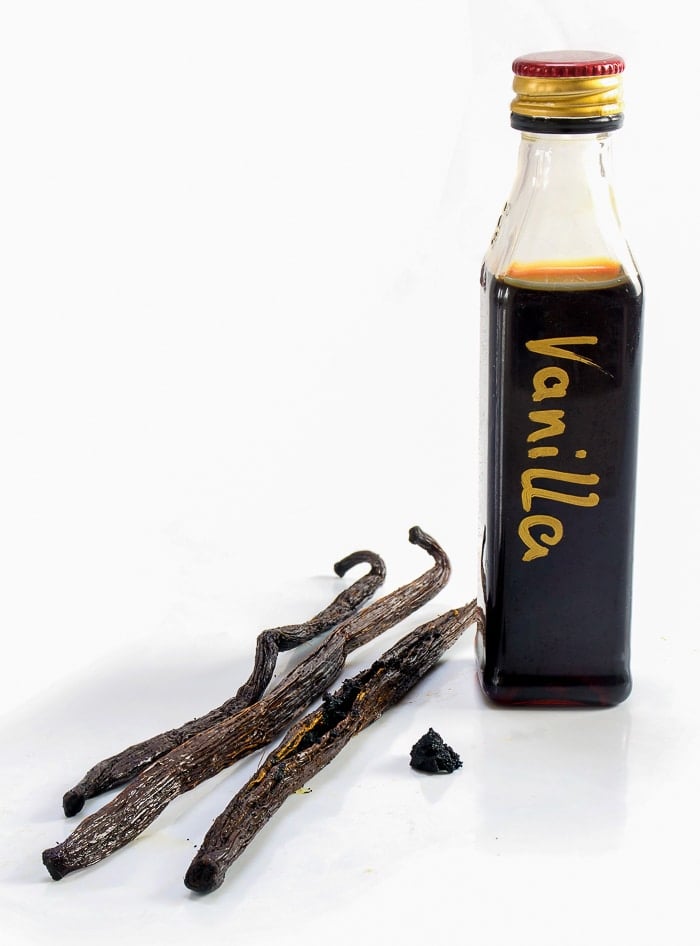
- 3 teaspoon vanilla extract, (or, even better, the seeds from one large vanilla pod)
- 1 cup whipping cream
Instructions
To prepare the cookie crumb crust
- In a small bowl combine the graham cracker crumbs, sugar and melted butter.
- Press the crumb mixture into the bottom of a lightly greased or parchment lined 9 inch spring form pan. (Grease bottom only!) Parchment paper is ideal here because it makes it very easy to release the cheesecake from the bottom of the pan.
To prepare the cheesecake batter
- Cream together the cream cheese and sugar for 2 to 3 minutes until well combined.
- Add the eggs, one at a time, beating well after each addition.
- Beat in the vanilla extract (or vanilla pod seeds. If using a vanilla pod, scrape all the seeds out and stir them very well into the whipping cream in the next step. This will help to break up the sticky vanilla pod paste and make sure the tint black seeds are evenly distributed throughout the cheesecake.)
- Finally blend in the whipping cream well until the batter is very smooth. Using a rubber bowl scraper/spatula, scrape the bottom and the sides of the bowl as well as the electric beaters/paddle and give the batter a final beating for 1 minute on a higher speed. This final step ensures that there are no lumps in the batter and introduces a little air into the cheesecake to make it lighter.
- Pour over the prepared base and bake in a bain marie at 300 degrees F for 60-70 minutes. (Oven temperatures will vary slightly. Mine takes the full 70 minutes and you can go to 75 if you feel you need to.)
- Don't be an compulsive oven door opener! Don't open it at all in the first hour.
- The cheesecake does not have to brown at all in order to be fully baked; the surface of the cheesecake should lose any shine when the cake is properly baked. It can still be slightly wobbly just at the center at this point.
- Remove the cake from the oven and run a sharp knife completely around the edge of the pan. This will allow for the cheesecake to shrink as it cools and hopefully not crack (Allow the cheesecake to cool thoroughly on a wire rack at room temperature. (NOT in the fridge). Refrigerate after fully cooled.
Notes
In my opinion, baking the perfect cheesecake requires the use of a bain marie during baking. A bain marie is simply a water bath that buffers the direct heat from the sides and bottom of the baking pan to more evenly bake the cheesecake from the sides to the center. I bake my cheesecakes in a 9 inch spring form pan that has the bottom and sides wrapped in multiple layers of wide heavy duty aluminum foil which forms a sort of boat that the cheesecake pan sits in. The roll of aluminum foil that I use is about 16 inches wide. I use at least 4 layers of foil to make sure that no water leaks in and ruins the crust of my cheesecake. The aluminum foil wrapped pan is then placed inside a larger baking pan; I use a 12 inch cake pan. Boiling water is then poured into the larger pan filling it from ½ to ⅔ of the way to the top.I find it best to pour the boiling water into the pan after it is placed on the rack in the oven as you are less likely to splash water onto the cheesecake or inside the aluminum foil. I reuse the aluminum foil for several future cheesecakes, adding a couple of layers to it each time just to be safe. EVEN IF YOU CHOOSE NOT USE A BAIN MARIE still use the aluminum foil wrap around the cheesecake pan. The aluminum foil still offers a good buffer to the heat. High heat and baking too quickly is the main reason that a cheesecake becomes dense and not creamy.
Nutrition Information
Yield
12Serving Size
1/12Amount Per Serving Calories 258Total Fat 15gSaturated Fat 9gTrans Fat 0gUnsaturated Fat 5gCholesterol 85mgSodium 114mgCarbohydrates 28gFiber 0gSugar 23gProtein 3g
The nutritional information provided is automatically calculated by third party software and is meant as a guideline only. Exact accuracy is not guaranteed. For recipes where all ingredients may not be used entirely, such as those with coatings on meats, or with sauces or dressings for example, calorie & nutritional values per serving will likely be somewhat lower than indicated.
Hello,
This looks delicious! I'd like to make it, but I don't understand : "3 eight ounce packages ounces cream cheese" . Maybe because I am not a native english-speaker or it is misstyped. Could you explain it or put it into other words?Thanks.
Anon, In the US, you can purchase cream cheese in blocks that are measured into 8 ounces. She is saying you will need 3 of those 8 ounce blocks...... (ie.. 24 ounces or 1 and 1/2 pounds)
We buy them that way in Canada as well Kelley. Thanks for your comments, Barry.
A total of 1 and 1/2 pounds of cream cheese.
I too, never stress if my cheesecake cracks, it will still taste good, just throw on some toppings and serve, love the new layout of your site:)
Do you bake the cheesecake graham cracker crust first ? I have always baked the bottom first and then added the cheesecake filling , and put back in oven
I don't but it won't do any harm if you choose to.
To stop cheesecake from cracking, beat sugar, cream cheese and sour cream at a relatively high speed. But when adding eggs, turn mixer to slowest speed. Otherwise you incorporate air, which is why they crack
Looks delicious. I just want to make sure thaat the cup of whipping cream is liquid. You don't whip it up or anything. Right?
That's right. Don't whip the cream just add it to the cheesecake batter and blend it it in.
Do you use whipping cream before it is beaten or something like Cool WHip?
OMG, don't use anything like Cool whip, it will be a disaster. Real whipping cream is what to use, no need to whip it.
I used cool whip what will happen just read comments ....and its already in oven....asap would be good if I could fix...
Ouch. I wonder how it turned out? I try not to use processed food products like that in any of my baking to be honest. Using cool whip is the equivalent of adding oil because that is what it is, plus the chemicals it takes to maintain it in that form. The whipping cream is also meant to be added in natural liquid form. Hope it was edible in the end. I'm actually quite curious now. 🙂
I'm curious about the whipping cream, the recipe I usually use calls for sour cream. Besides perhaps a difference in taste what is the benefit of using whipping cream instead? Perhaps I'll have to try your recipe so I can compare myself.
It's the recipe I've always used but sour cream would work too although there is a little less fat in most sour cream.
How do you cool this cheesecake? Often they stay in the oven with the door open slightly and cool there for a set amount of time, this recipe doesn't say anything about how to cool and when to release the springform mold, both of which are important with cheesecakes I believe.
You can do that if you like. It's not that important. I let it cool on a wire rack on the countertop to room temp before refrigerating it. Don't remove it from the pan until it is completely chilled.
Debbie, Lets say its summer time and your house is ice cold (like mine is that time of year)... Bringing a cheesecake out of a hot oven into a cold room will make it shrink and fall because of the extreme temperature change... That is why recipes say to let cool in oven with door open. But now its winter time..... and my house is warm and snug... it will not hurt the cheesecake to bring it out as its not such a change.... Make sense? Im a culinary arts instructor and we work in a hot kitchen daily so its never an issue... but at home im more aware.. 🙂 Happy baking!
I'd like to make this in my 8" springform pan. Would that work? Maybe add a few minutes to the baking time? Thanks and I can't wait to try this recipe 😉
I don't think it will fit into that small a springform pan. Perhaps try 2/3 of the recipe. Baking time would then probably be shorter but I've never made a cheesecake that small...hence this waistline. 🙂
Thanks! I took out 1/5 of the batter and made some mini cheesecakes with it 🙂 it turned out amazing 🙂 can't wait to have a slice tomorrow. Again thanks
Se ve estupendo, Hago uno parecido,voy a hacer la prueba, gracias..
Buena suerte . Espero que les guste.
I'm trying to find a creamy cheesecake recipe and this one sounds like it might be the one! My family doesn't like the real "dense" cheesecake. Does using the cream give it a lighter texture? Recipe sounds yummy.
Dense cheesecake is overbaked cheesecake IMHO. This one should please your family for sure.
When wrapping the spring form pan do you just wrap the bottom and the sides and if so if it's a little lumpy would that be ok considering I want the pan to be straight?
I lay the pan on the layered sheets of aluminum foil and bring the foil up over the sides. It's always flat on the bottom and just crumples at the sides.
about how long does it take to cool and ready to eat once it's out of the oven?
Count on 3 to 4 hours. Don't rush it from the oven to the fridge or it will be too soft. It should be out of the oven at least an hour or more before going into the fridge to cool completely.
what are some toppings you put on cheesecakes?
Lots of fruit toppings, lemon curd, chocolate ganache...just search cheesecake on the website and you'll see plenty of ideas.